Adding an advertiser in Ucliq allows you to manage and customize advertising offers, track conversions, and set up postbacks for accurate attribution.
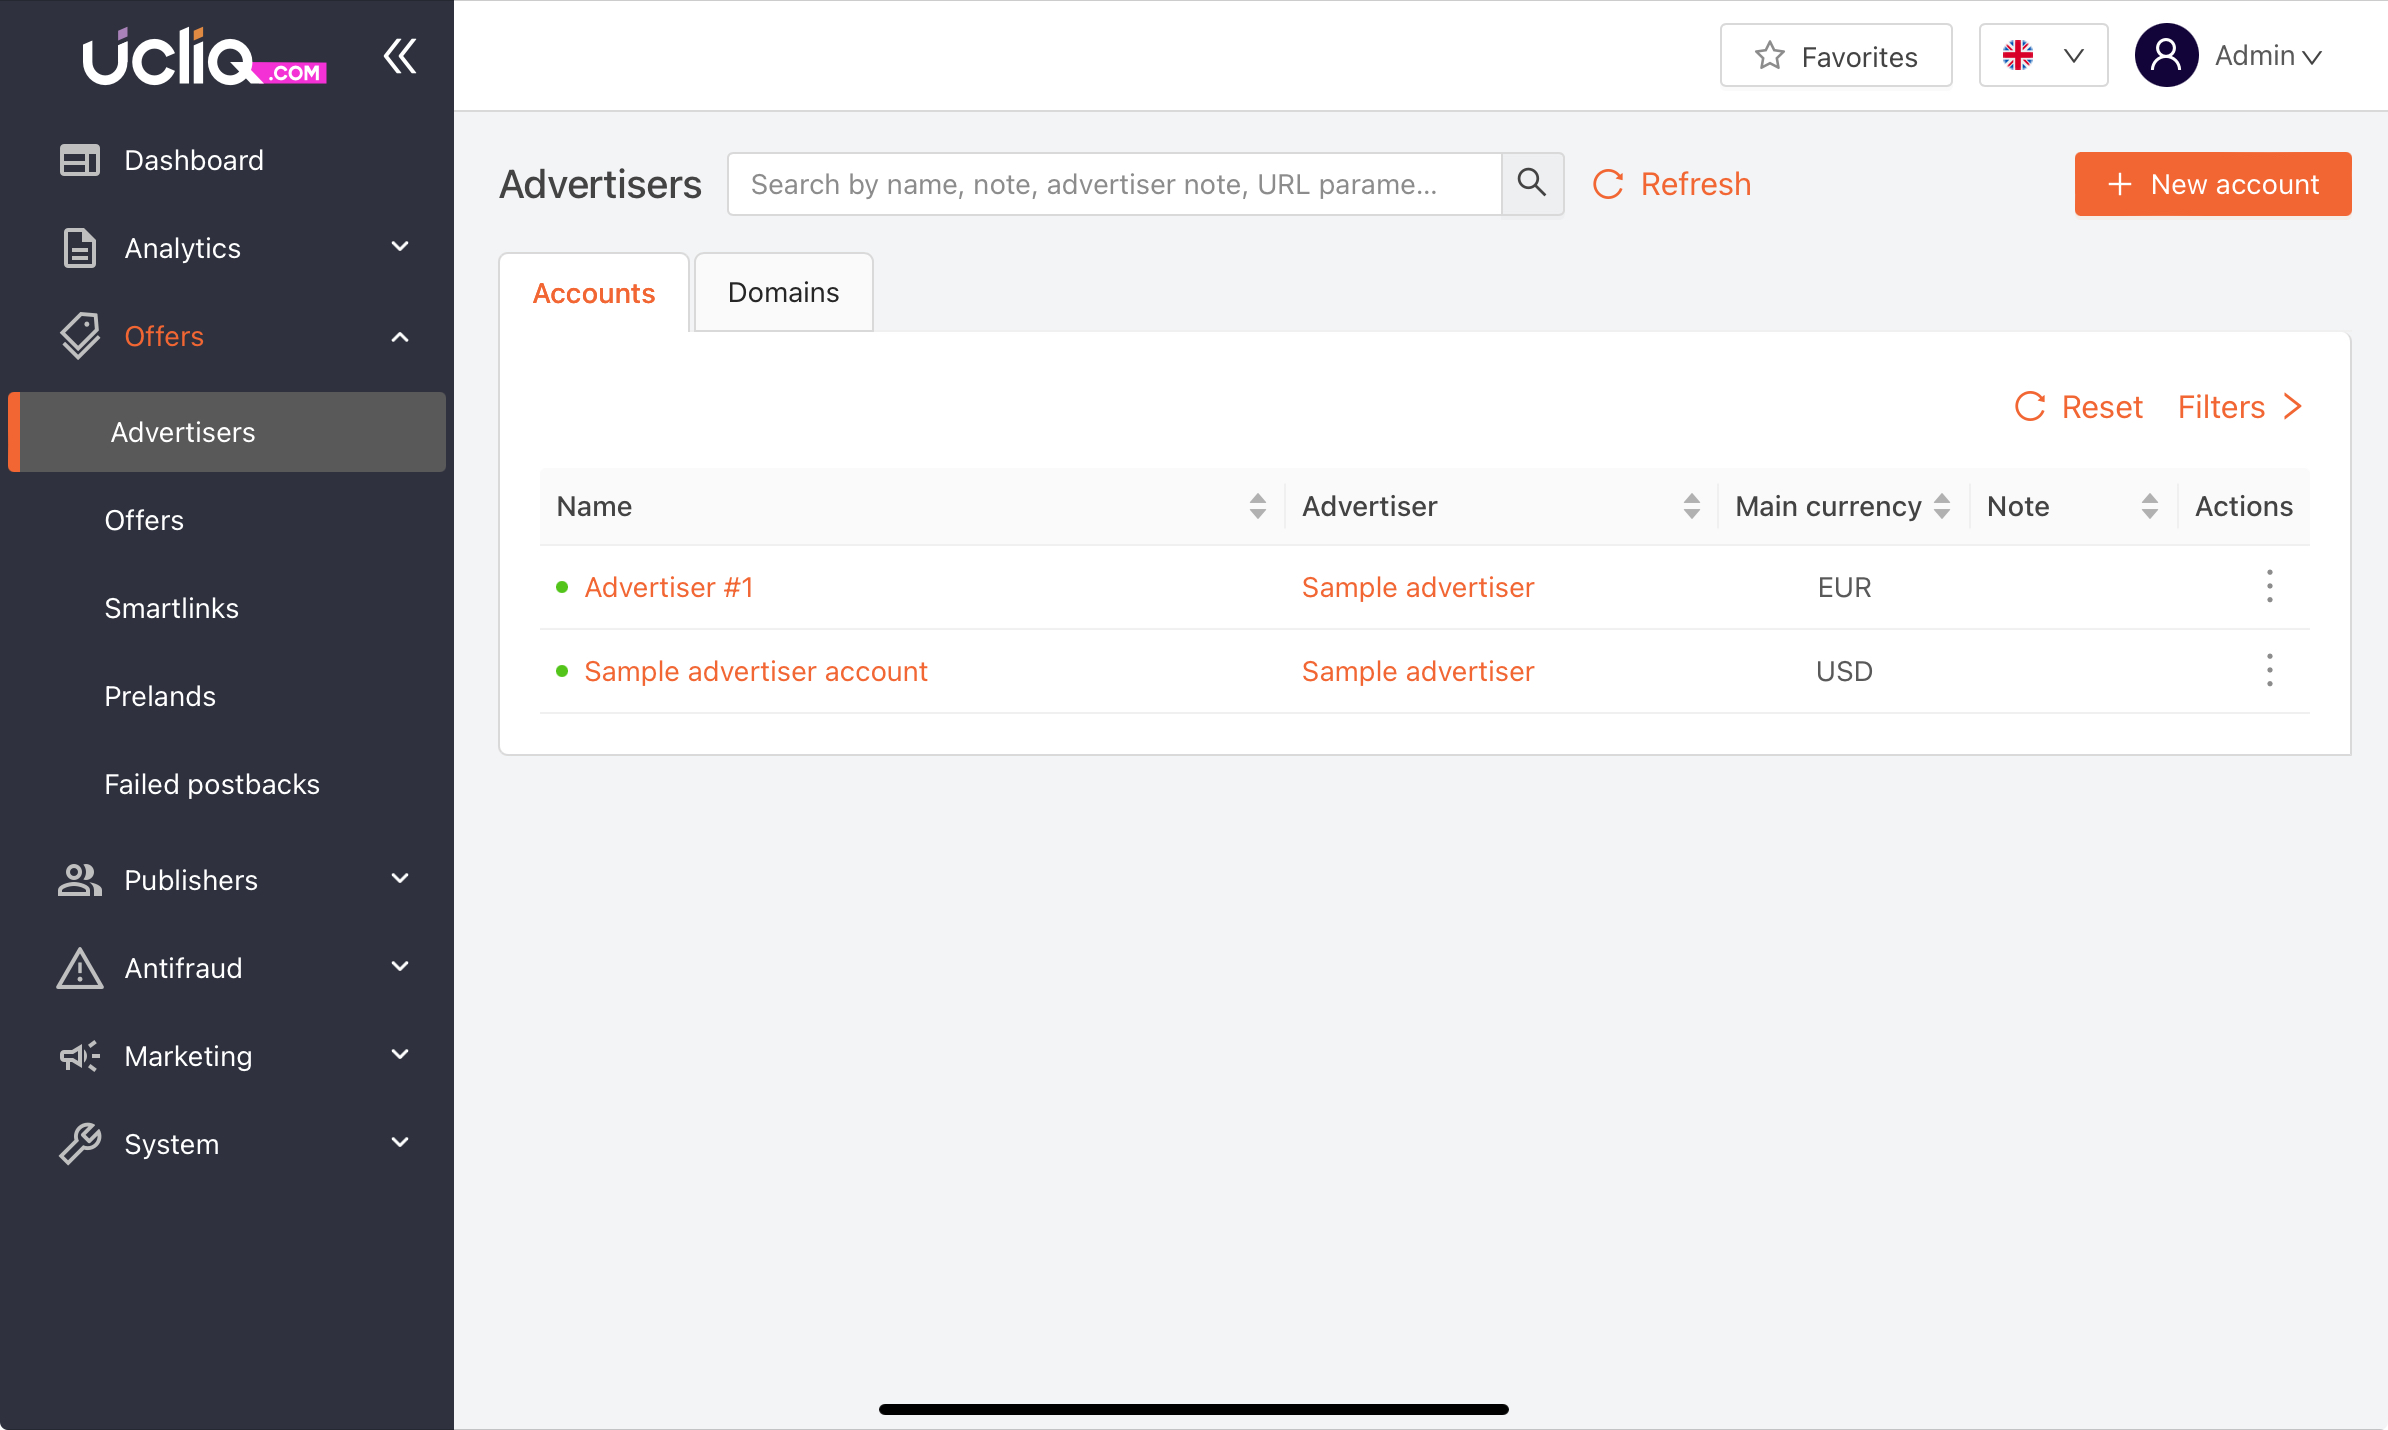
To access the advertisers section navigate to the Offers > Advertisers . Here you can view the list of existing advertisers or create a new one:

Adding a New Advertiser Account
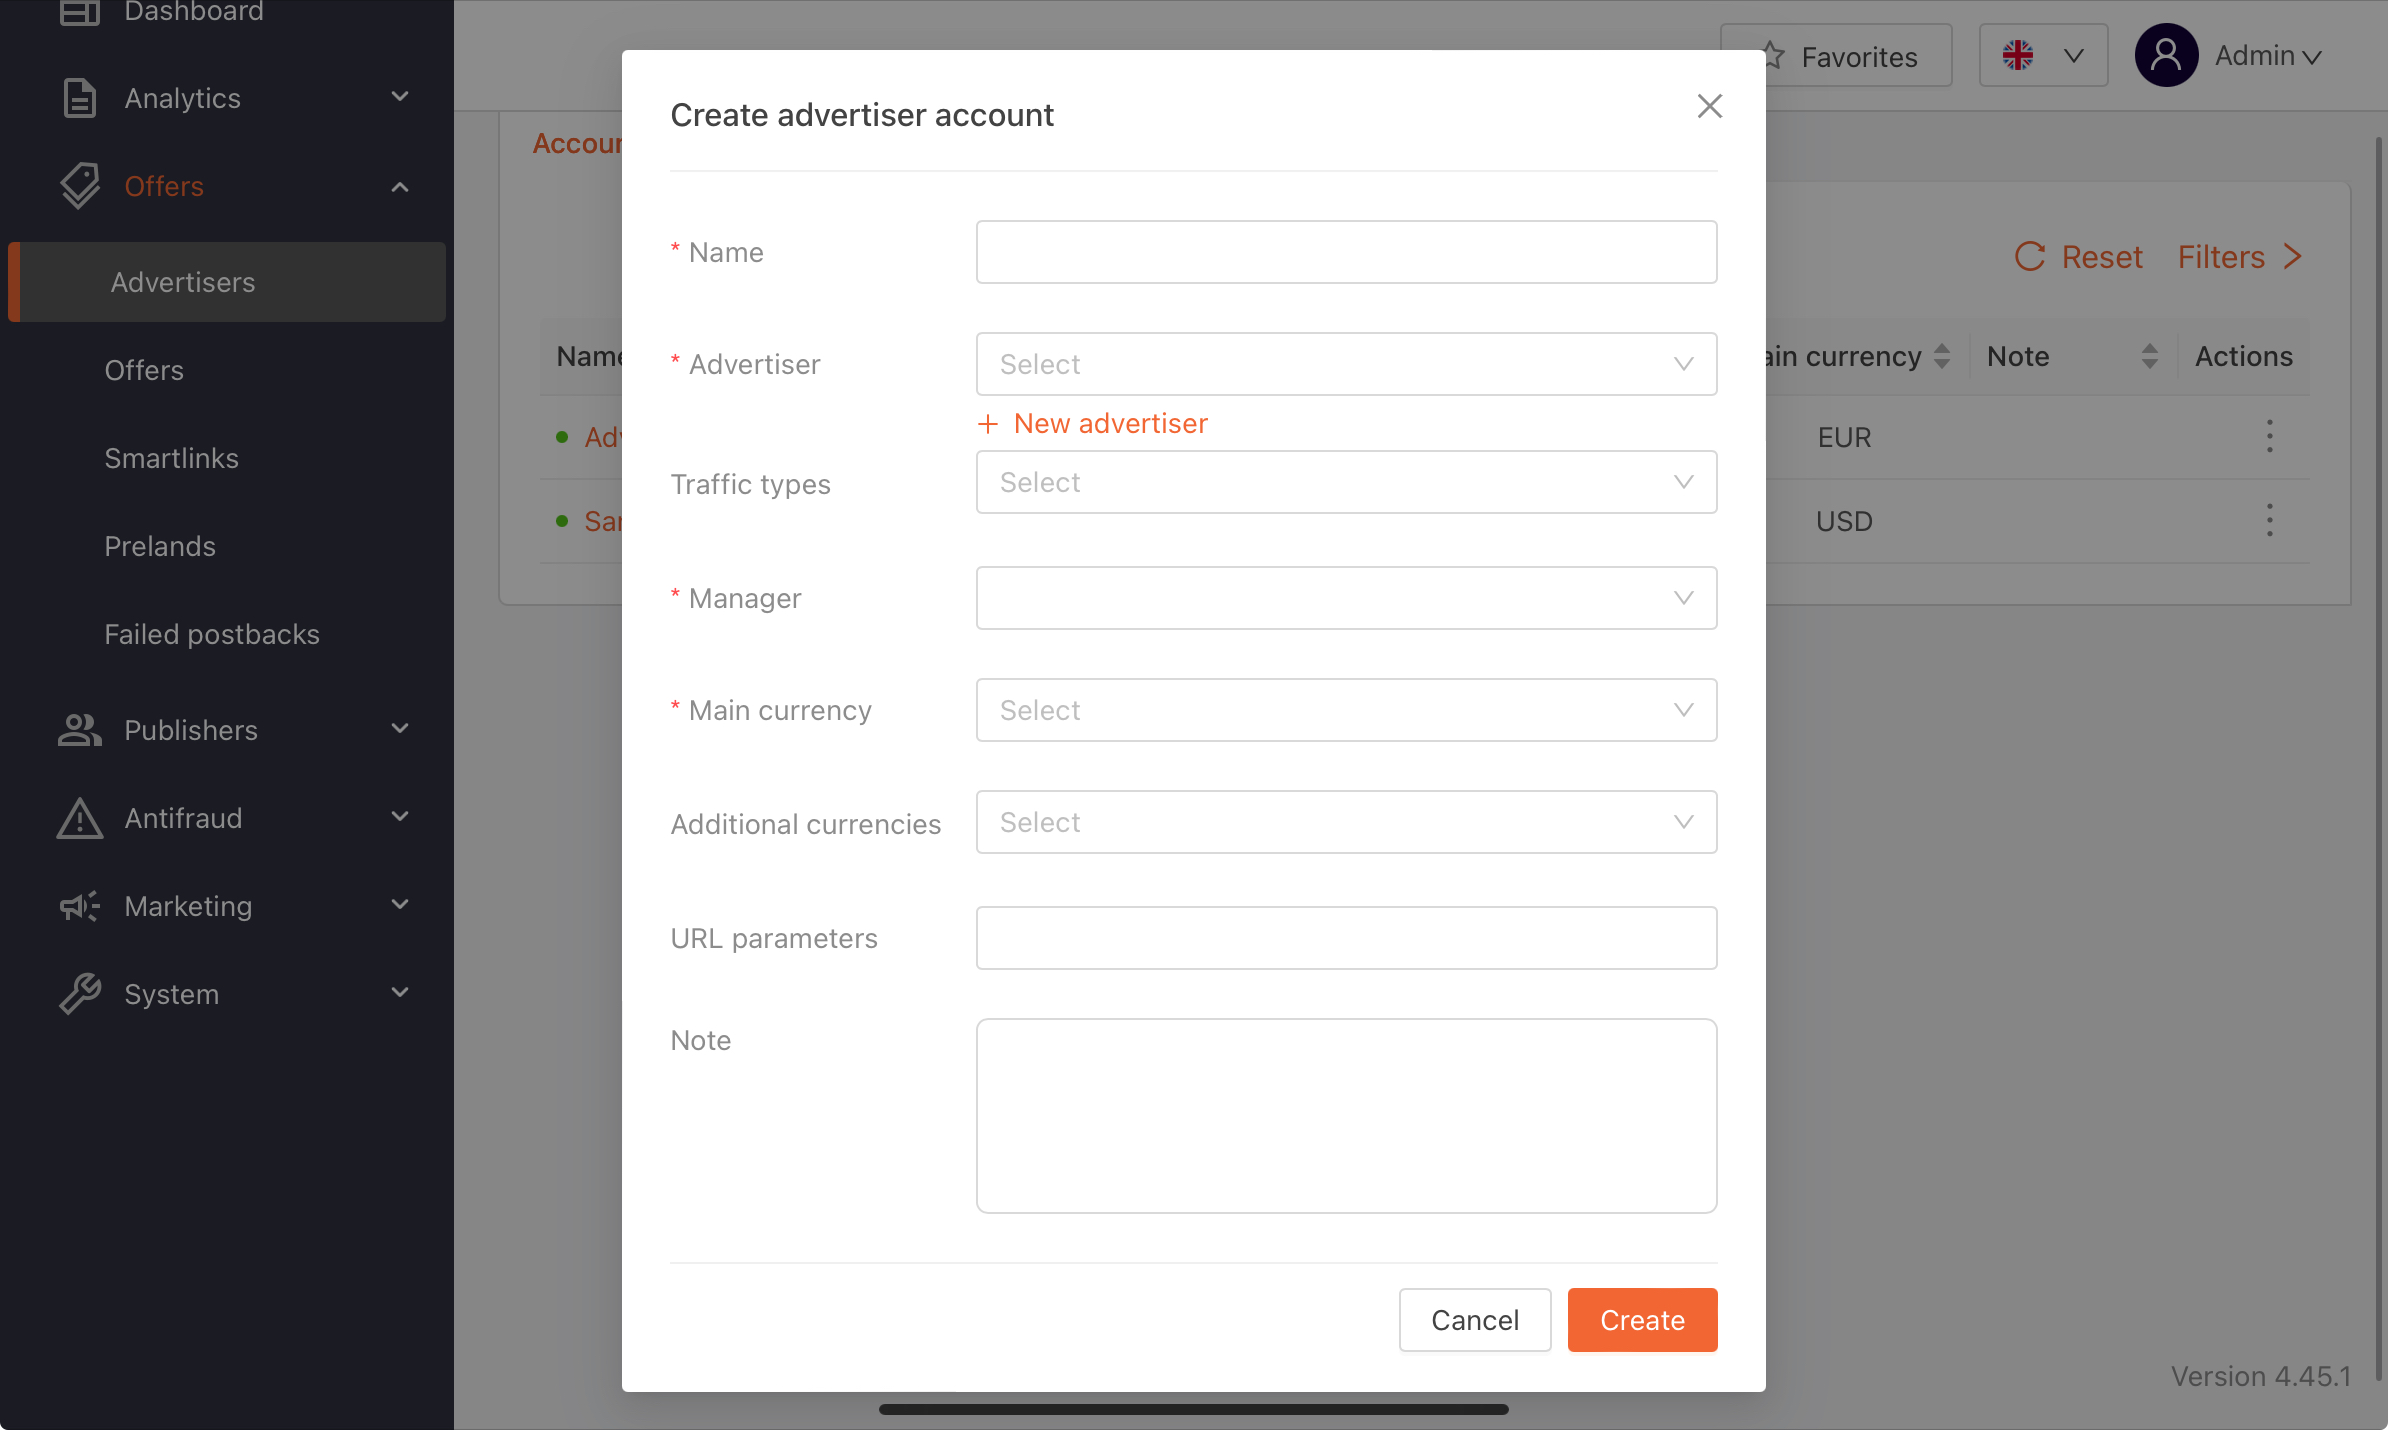
Click on + New Account button to begin setting up a new advertiser, then define advertiser properties:
Name: Enter the name of the advertiser, which will be used to identify them across the platform.
Advertiser: Since you are adding a new one, click + New advertiser
Traffic Types: Specify the types of traffic allowed for this advertiser’s offers (e.g., display, email).
Assign a Manager: Assign a manager to the advertiser account to oversee and maintain account activities. Only users with the Advertiser Manager role are selectable here.
Currencies: Choose a default currency for postbacks and add any additional currencies supported by this advertiser.
URL Parameters: Predefine any URL parameters needed for offers under this account. These parameters are auto-filled in offer links for consistency.
Advertiser Notes: Add any important details or specific conditions for working with the advertiser.

After filling in all required details and reviewing configurations, click Save.
The new advertiser account is now set up and can be assigned offers and traffic, managed from the Advertisers section.
Best Practices and Troubleshooting
Use Consistent Naming Conventions: Ensure each advertiser name is unique and descriptive to avoid confusion.
Verify Currency Settings: Make sure the default currency aligns with the advertiser’s requirements, as it impacts all financial reports and postbacks.
Monitor Conversion Data Regularly: Track performance metrics in the Analytics section to ensure postbacks and conversions are correctly attributed.