Step 1: Configuring the tracking link
Go to the Offers > Specific offer > Links and add the advertiser tracking link. It will contain parameters to which you need to add matching macros (e.g., {click_id}, {source}).

Example:https://advertiser.com/?click_id={click_id}&affiliate={publisher_id}
Step 2: Setting up the advertiser postback
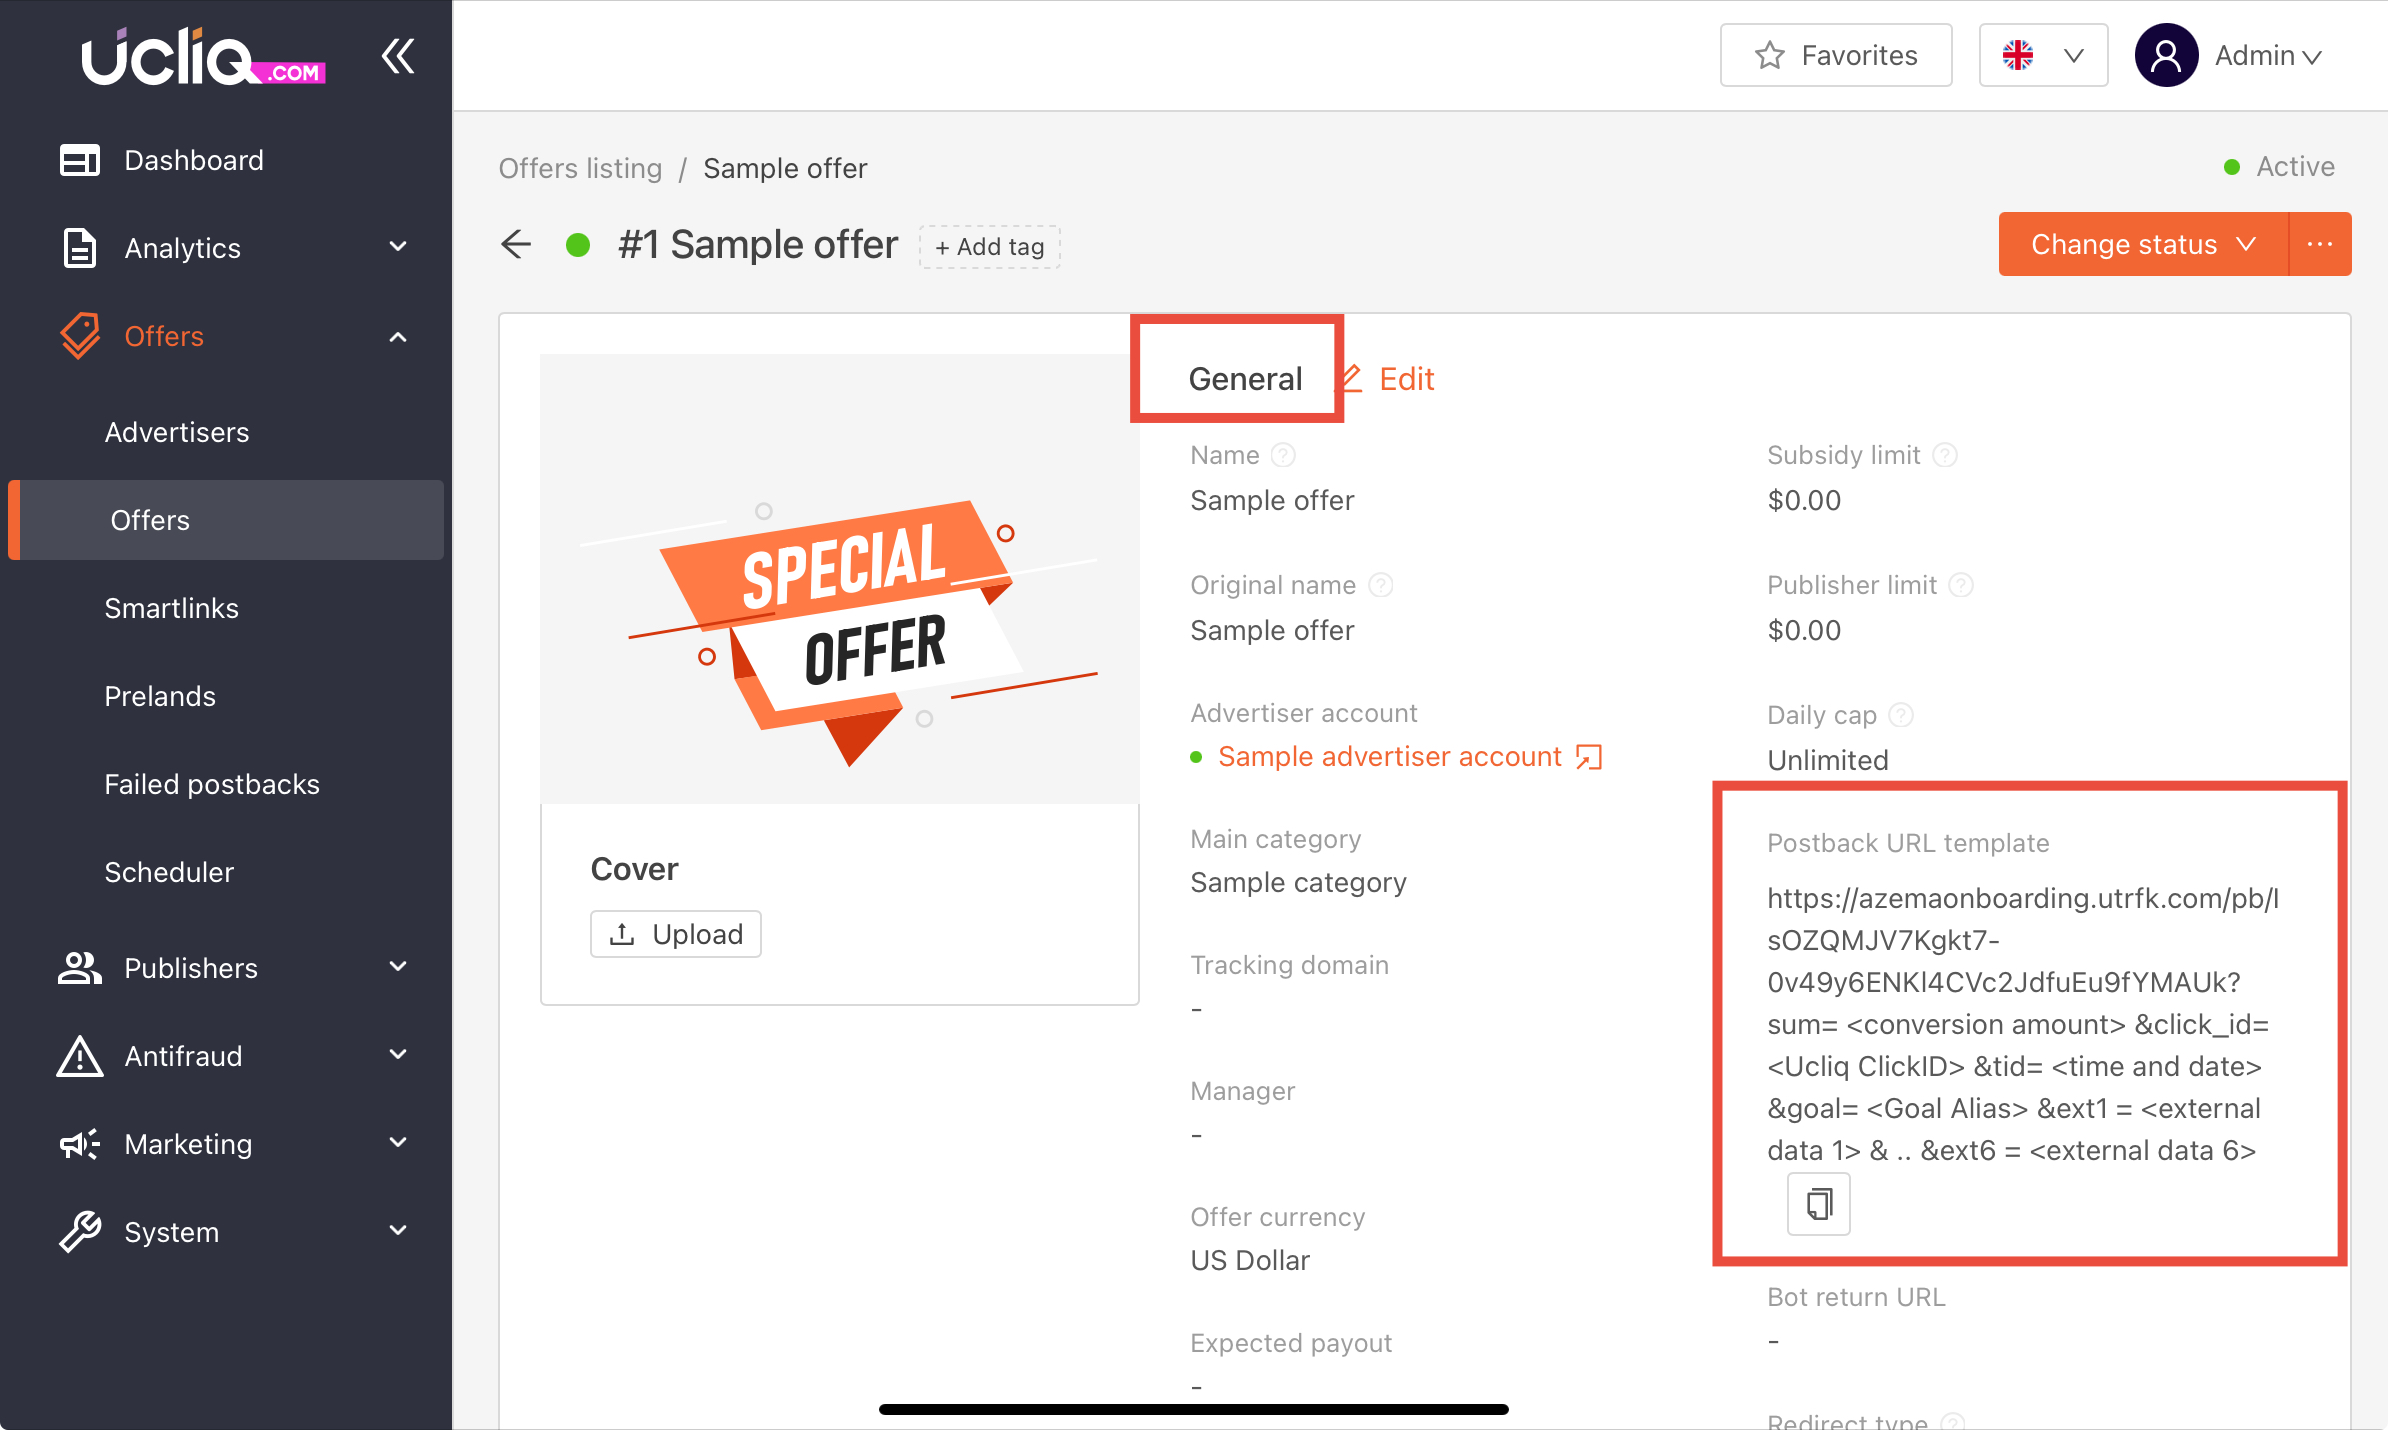
Go to the Offers > Specific offers > find Postback URL Template in the general widget:

Copy the unique postback URL for the offer:
Example: https://track.ucliq.com/pb/securekey?click_id={click_id}&sum={sum}&goal={goal}
Provide this URL to the advertiser and let them know they should add their own macros to our parameters in the link like click_id
The postback link can include optional parameters like sum (conversion value) and goal (conversion type) if needed. The advertiser must add the macros to these parameters too.
Step 3: Testing the setup
-
Generate a Test Click
Use the tracking link mentioned in Step 1.
Paste the link in your browser’s address bar and you will see the click ID
-
Test the Postback
Use the postback URL from Step 2 and test the data transmission by adding a test value for the
sumandclick_idparameters.Copy the modified postback URL and paste it into your browser’s address bar.
The server should respond with "OK" (this means the postback was received and processed).
If the response is not "OK," check the URL and parameters for errors.
-
Check the Conversion
After testing the link, the conversion should appear in the Conversions section of the Admin Panel. This confirms that the postback is working correctly.
Common parameters used in postbacks include:
click_id: Unique identifier for the click (mandatory).
sum: Conversion value (optional).
goal: Conversion type or goal alias (optional).
tid: Transaction ID for deduplication (optional).
Tips
-
Ensure macros consistency and double-check that
click_idand other macros are supported by the advertiser’s system. -
Use secure postbacks and avoid sharing postback URLs publicly to prevent misuse.
-
Conduct periodic tests to ensure the integration remains functional.
-
Use UCLIQ’s analytics tools to verify conversions and performance.