Pros of CNAME integration
-
Allows you to keep your main domain for other purposes
-
Easier and more flexible than full DNS delegation
-
Avoids conflicts with existing services on the root domain
Domain eligibility
Before adding a domain, make sure it meets the following criteria:
-
Only subdomains can be added (e.g.,
www.domain.com,my.domain.com,hello.my.domain.com). -
Root domains (e.g.,
domain.com) cannot be used. -
You must configure a CNAME record at your domain registrar or DNS hosting provider before adding it to the system.
By following these guidelines, you’ll avoid potential conflicts and ensure a smooth setup. Now, let’s go through the steps to add your domain correctly.
How to add a domain via CNAME
Set up a CNAME record with your domain registrar or DNS provider:
-
Create a new CNAME record
-
Use your subdomain (e.g.,
wwworwww.domain.com) as the Host/Name -
Set the CNAME value to the CDN address provided by the system
-
Save the changes
-
The CDN value (
<cdn>) will be provided by the system when you add the domain.
Go to System > Domains section.
Add a new domain by clicking the CNAME button and complete the required fields:


CDN: Select the Content Delivery Network (CDN) for DNS balancing.
Domain: Enter your third-level domain (e.g., www.mydomain.com).
Comment (optional): Add any relevant notes about the domain's purpose.
Click Save to complete the process.
Activate the domain by clicking Edit button and changing the status:

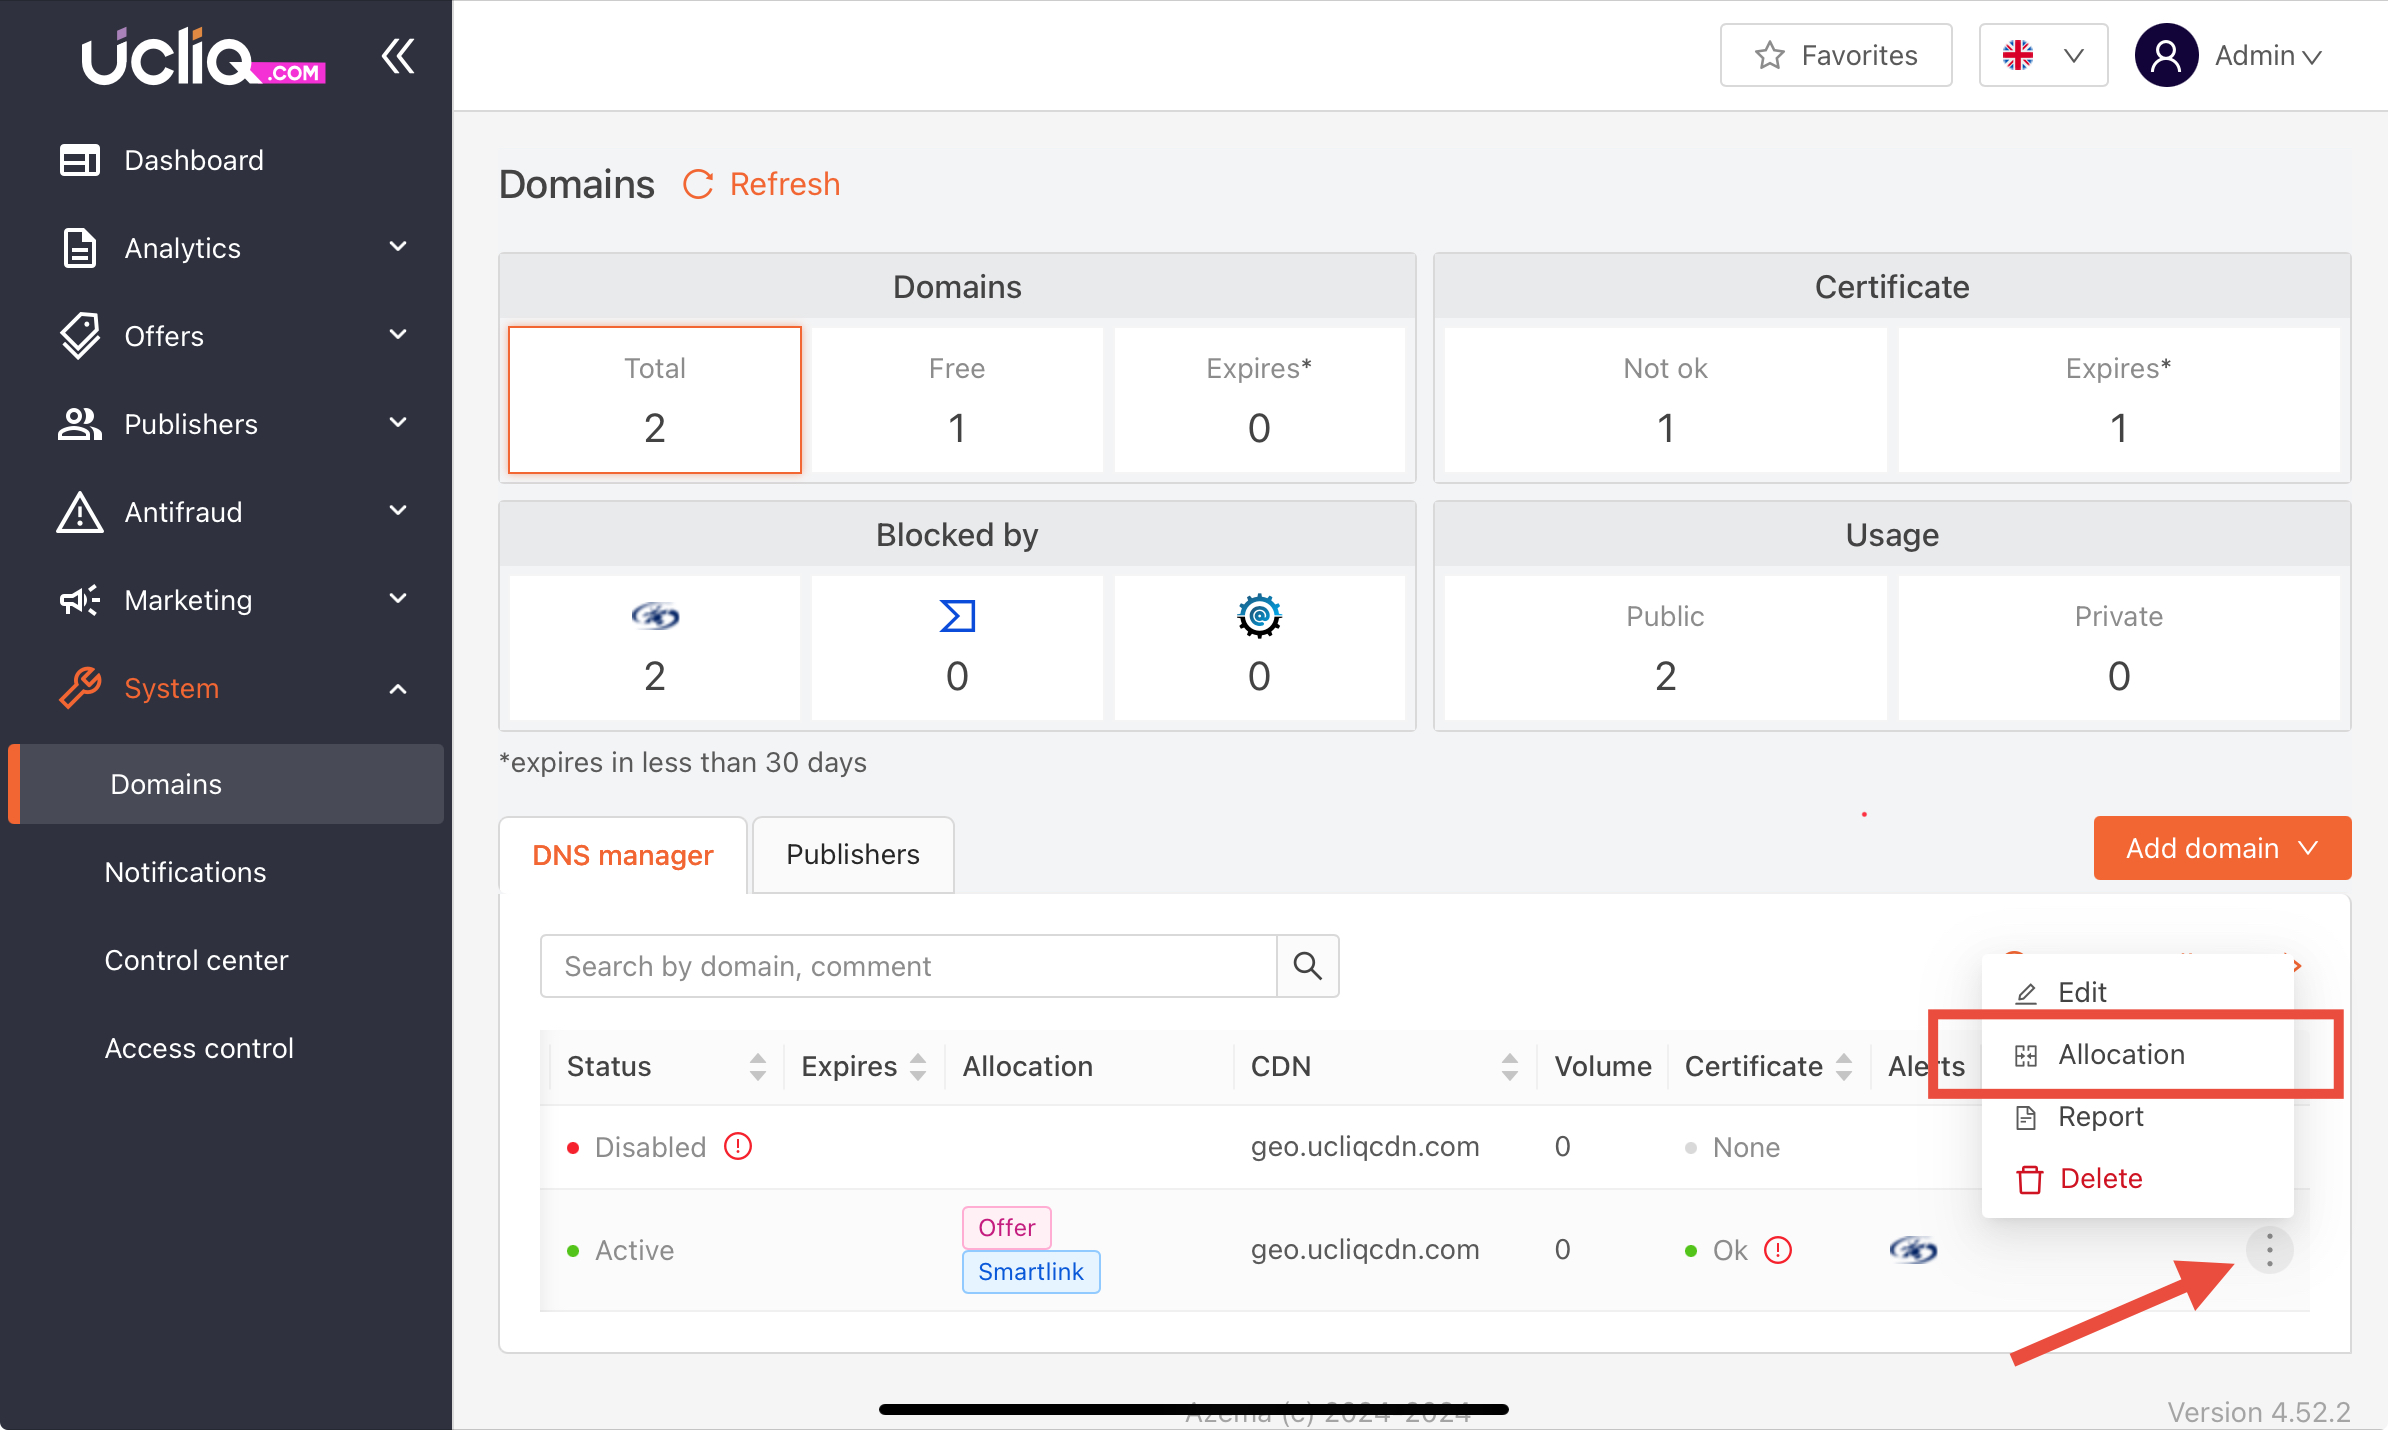
Assign domain usage
Navigate to the Allocation Tab within the Domain Management section.

Assign the domain to the desired purpose (e.g., offers, campaigns, or smart links).
Updating or Replacing an Existing Domain
If you need to update or replace an existing domain, follow these steps:
Replace the existing domain
Go to System > Domains section.
Select the domain you want to replace and click Replace button.
Enter the details for the new domain following the steps in the "Adding a New Domain" section.
Transfer campaigns and links
Decide how you want to handle the campaigns and shortlinks associated with the old domain:
-
Split Traffic: Distribute traffic between the old and new domains.
-
Full Transfer: Transfer all campaigns and shortlinks to the new domain.
Validate changes
Ensure that the new domain is correctly configured in all associated campaigns and shortlinks.
Test the links to confirm they are functioning as expected.
Best Practices for Managing Domains
-
Always ensure that DNS settings are configured correctly with your registrar.
-
Monitor domain health regularly to avoid disruptions in campaigns.
-
Use clear comments and naming conventions for easy identification of domains in the UCLIQ system.
If you encounter any issues or have questions, feel free to contact our support team for assistance.