Before creating offers, your account must have:
-
Google Ads functionality enabled
-
A Google-certified tracking domain assigned by your manager
Without this domain, Google Ads tracking will not work correctly.
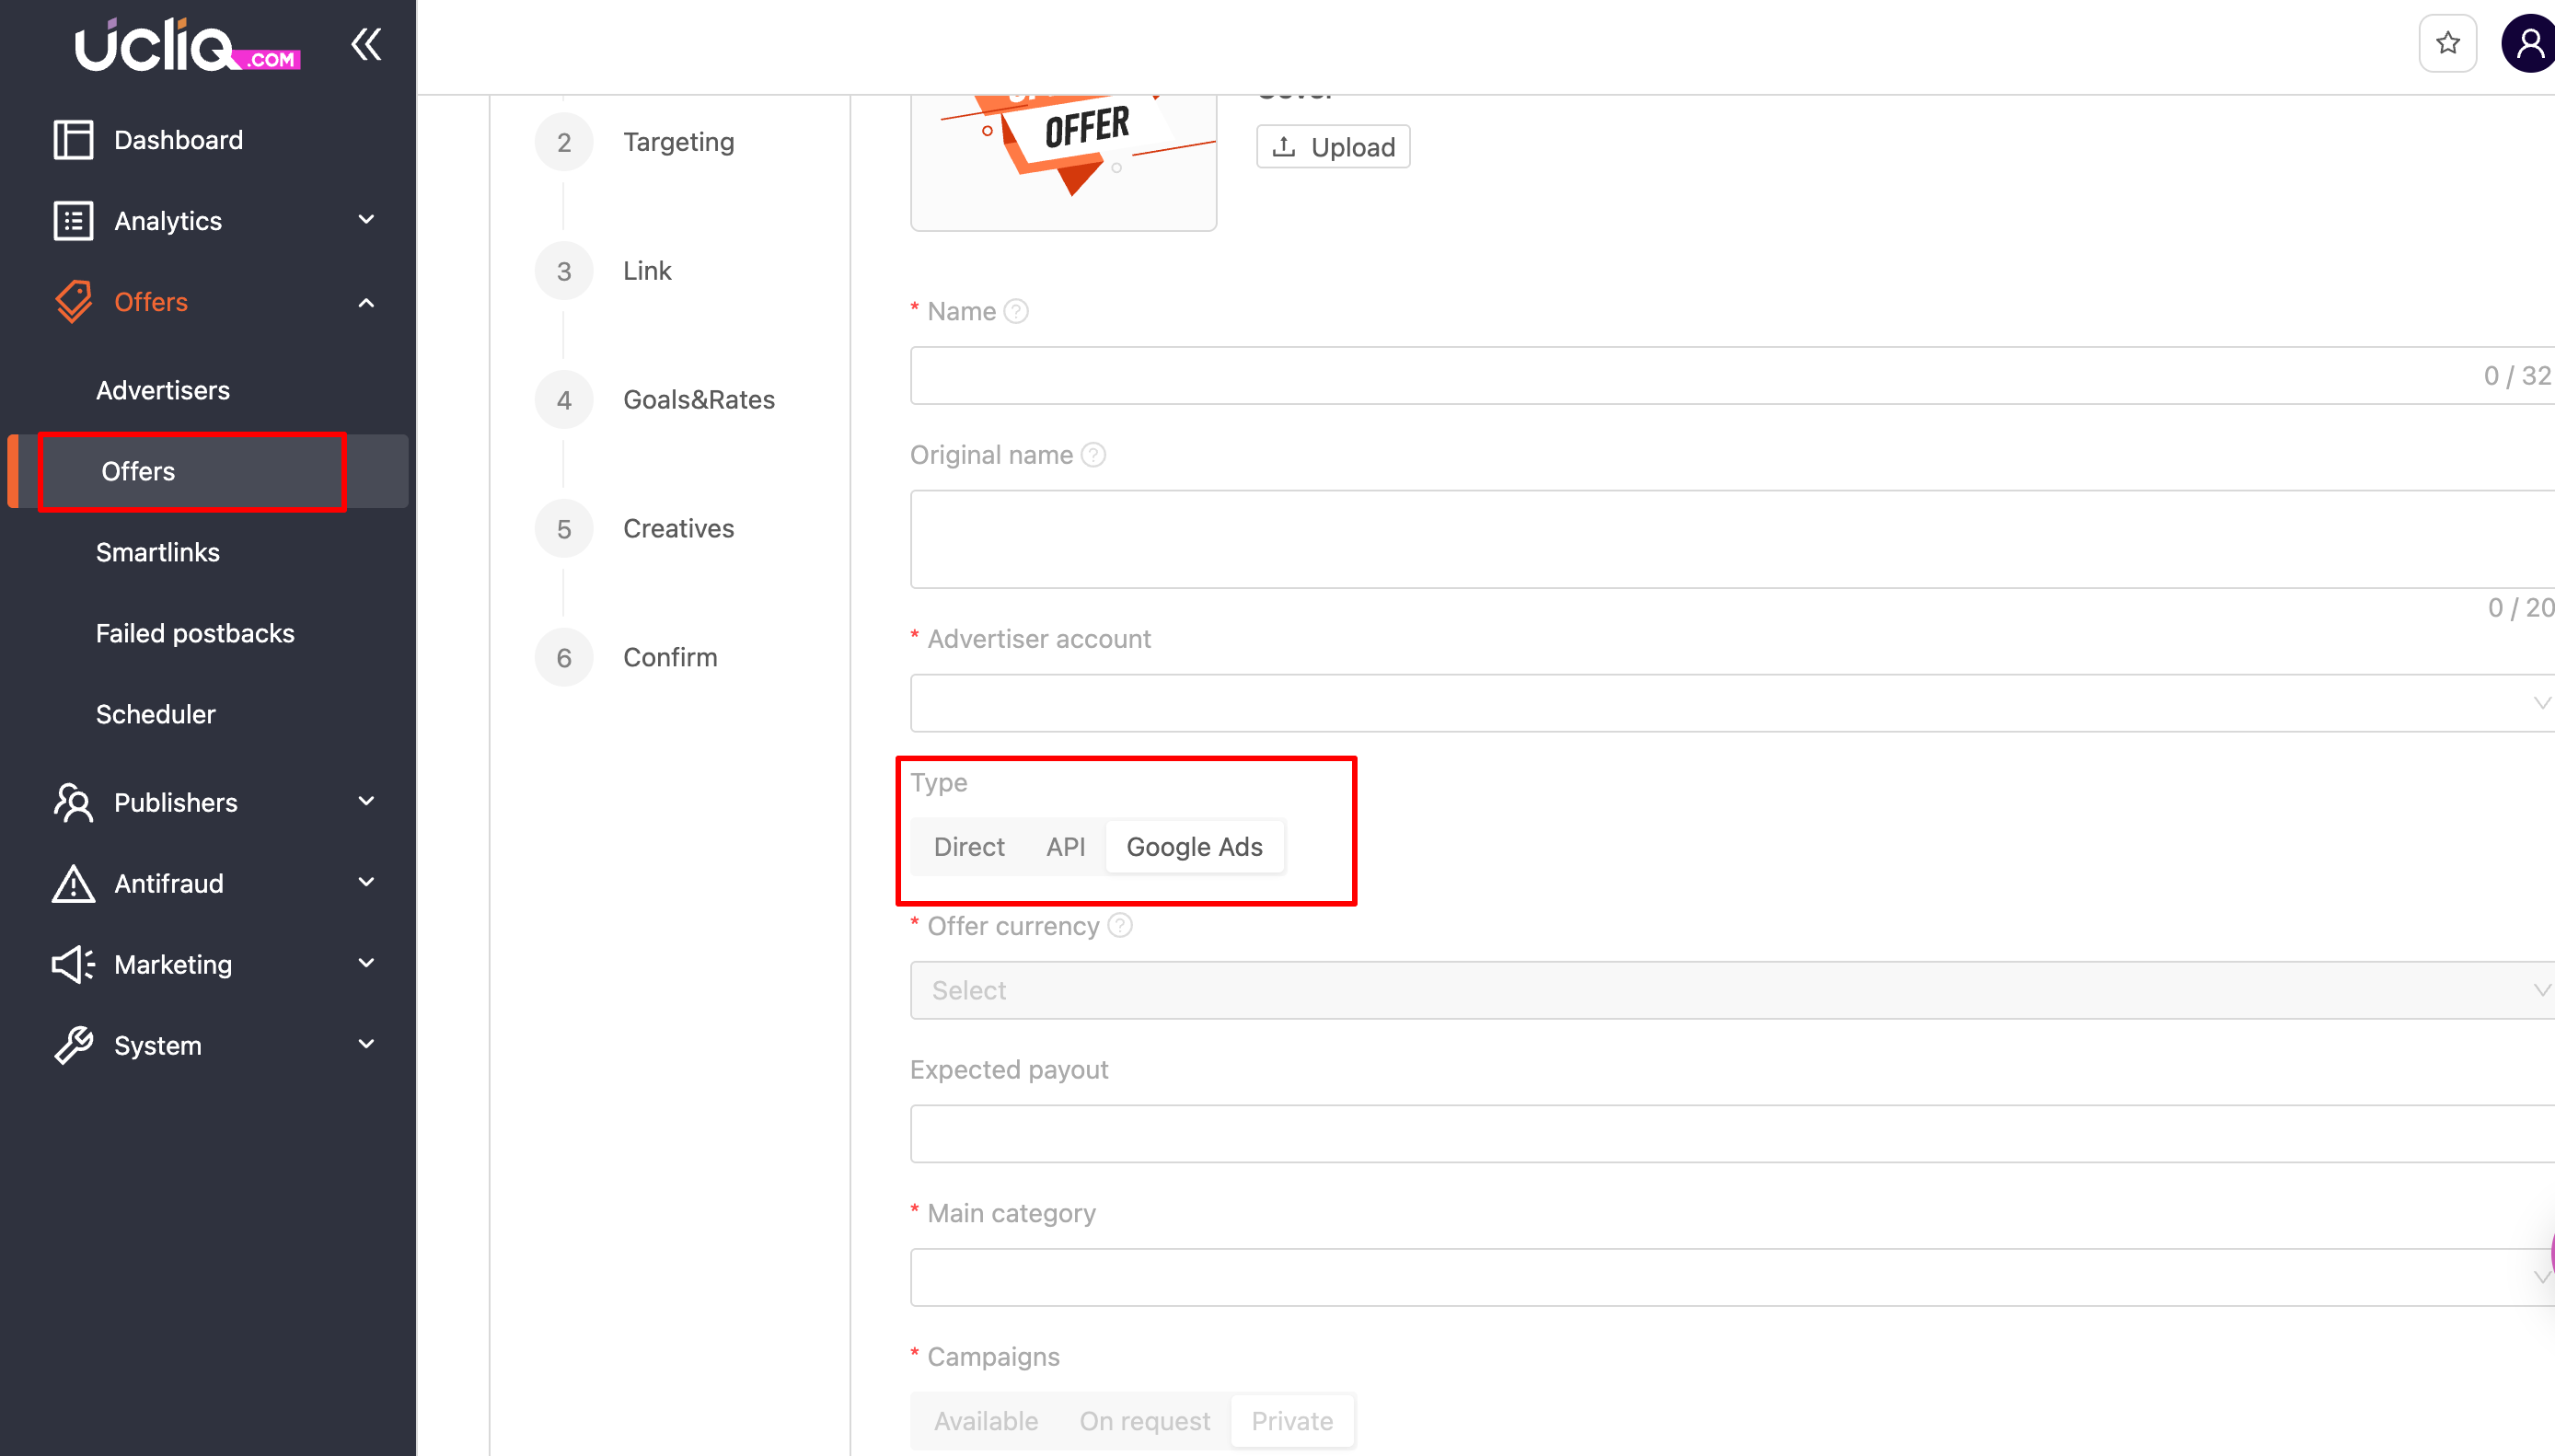
Step 1. Create a Google Ads offer in Ucliq
-
Go to Offers > New Offer
-
Fill in the offer name
-
Select your Advertiser account
-
Set Offer type to Google Ads
-
Choose:
-Offer currency
-Category
-
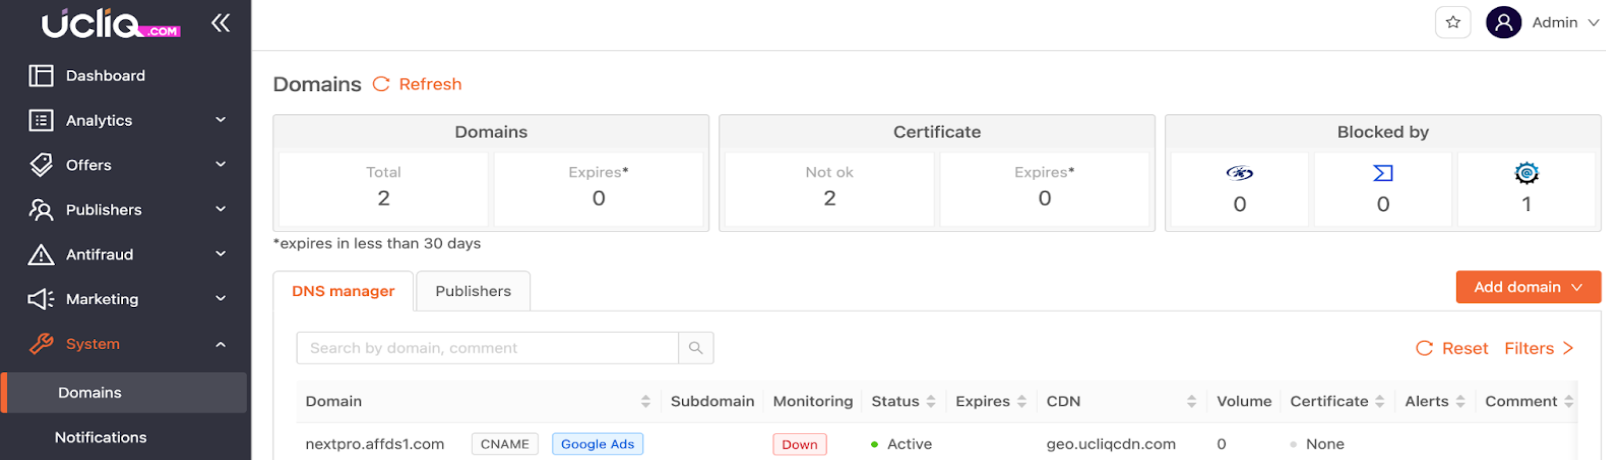
Select a Google-certified tracking domain
-
Click Next
If no tracking domains are available, contact your account manager.
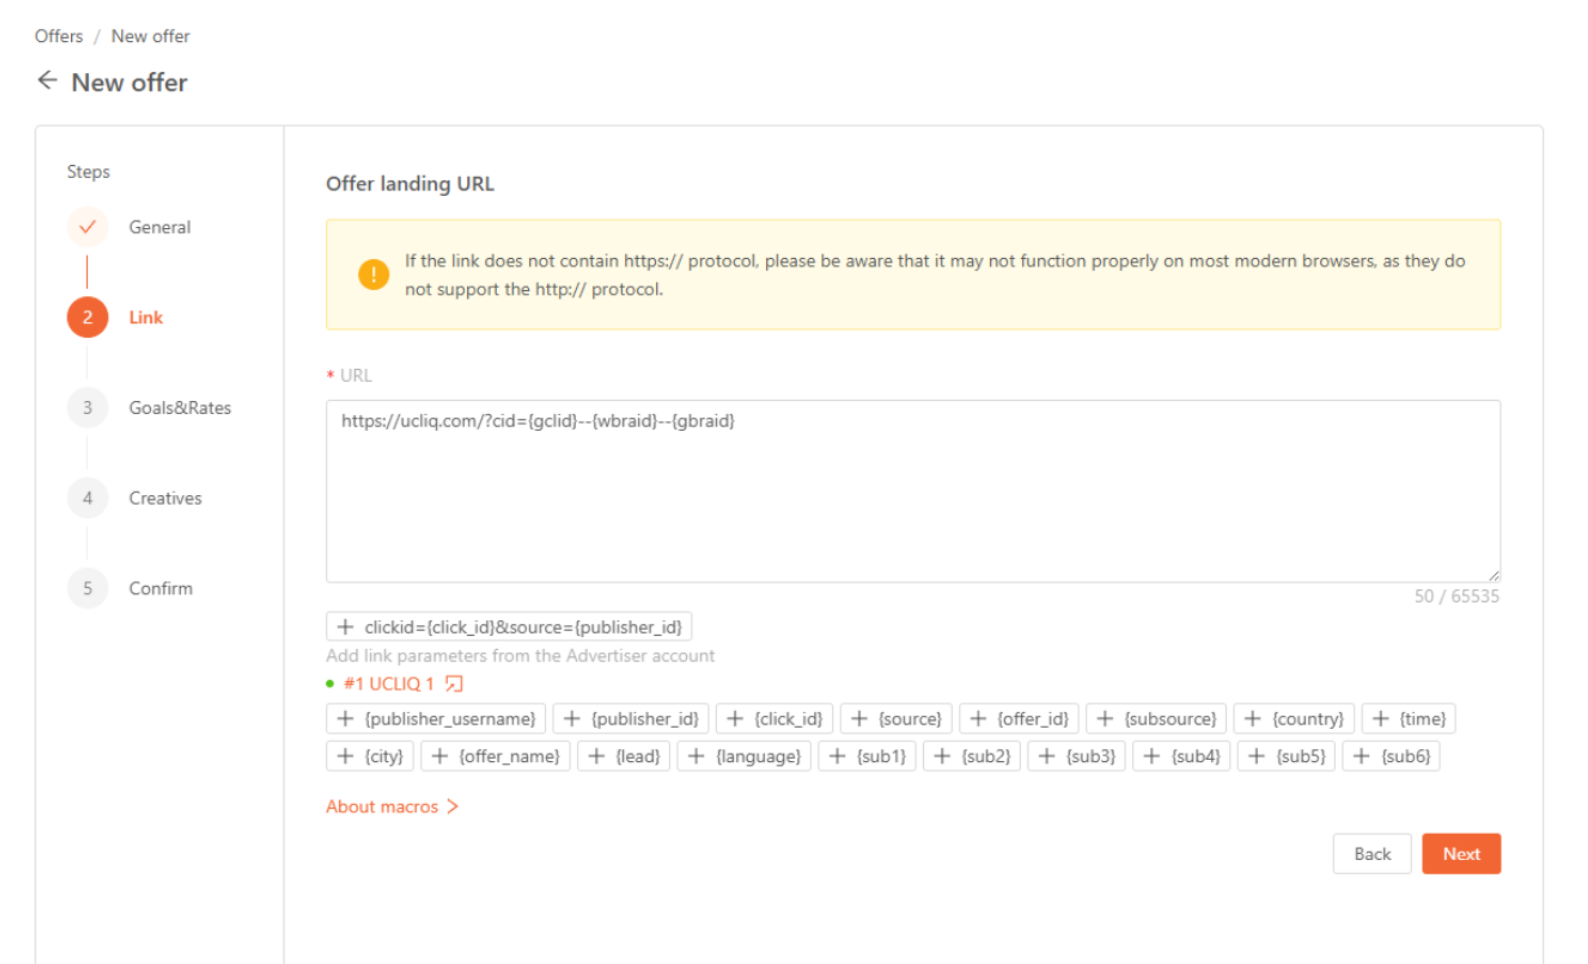
Step 2. Configure the landing page URL
In the Link step:
-
Set your Offer landing URL (final destination page)
-
Make sure the URL:
-Uses HTTPS
-Is the final URL (no redirects to other domains)
Click ID configuration
To support parallel tracking, Google click IDs must be passed to your landing page.
Recommended template:
cid={gclid}--{wbraid}--{gbraid}
-
cidis an example parameter name -
You may replace it with your own click ID parameter
-
The same parameter must be used on your landing page and in postbacks
Step 3. Configure goals and creatives
-
Set your default payout goal
-
Add creatives (optional) that may be used in Google Ads campaigns
Click Next to finish offer creation.
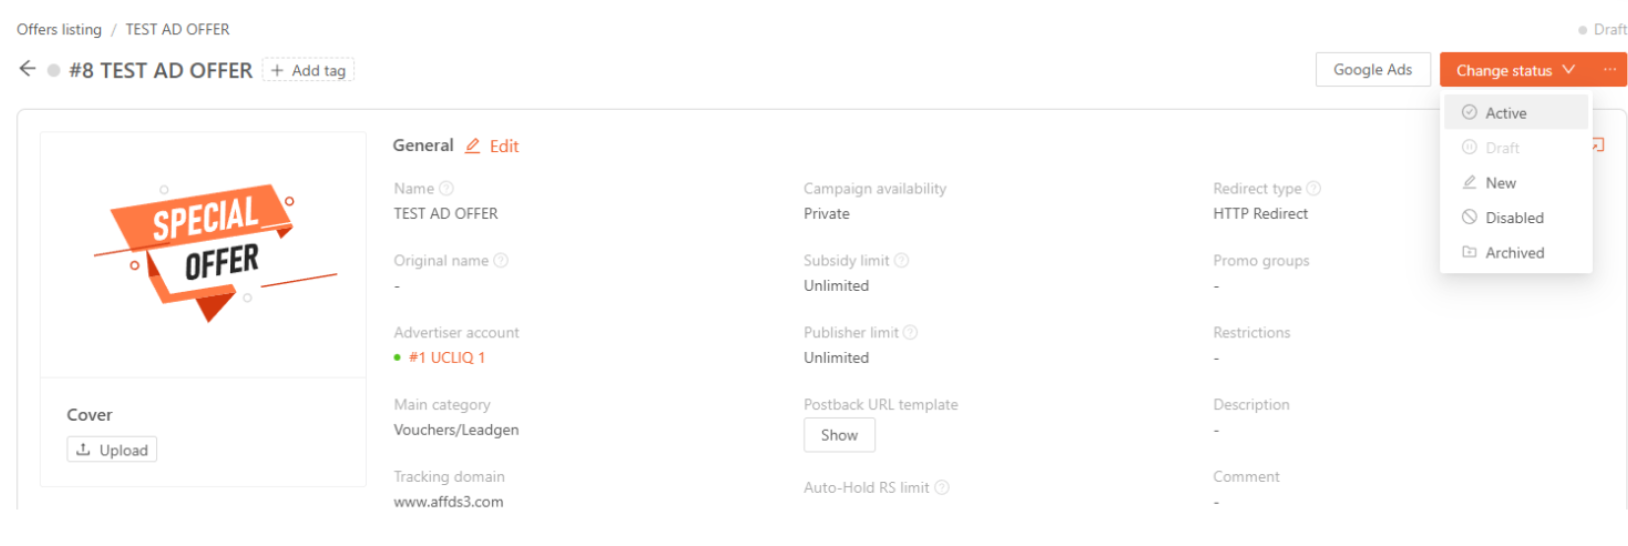
Step 4. Activate the offer
-
Open the created offer from the Offers list
-
Change the status to Active
-
Scroll down to Landing Configuration
Here you can:
-
Adjust landing URL and parameters
-
Review tracking and postback templates
-
Ensure macros match your landing page setup
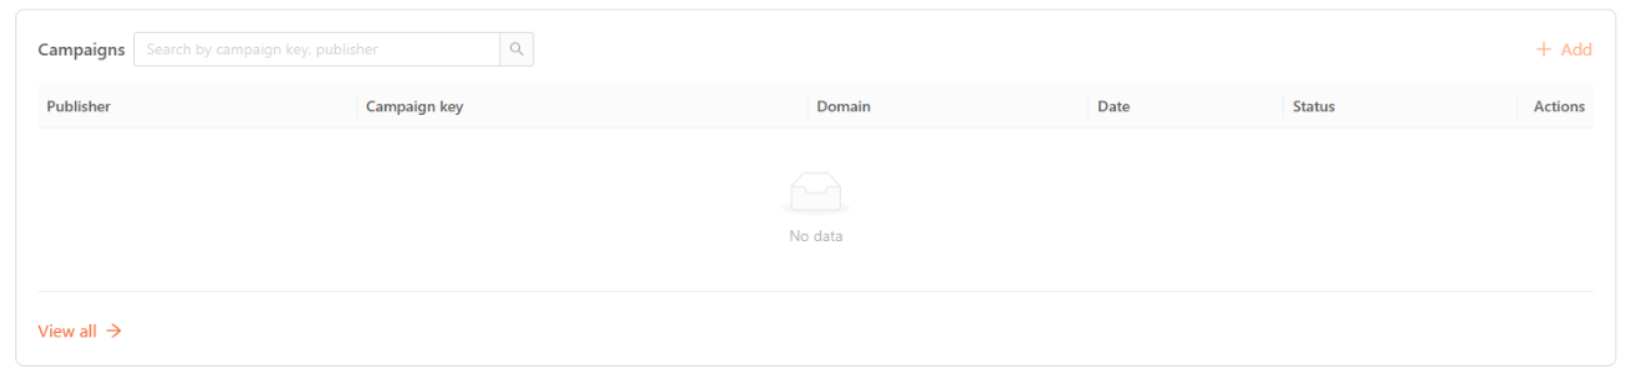
 Step 5. Launch a campaign in Ucliq
-
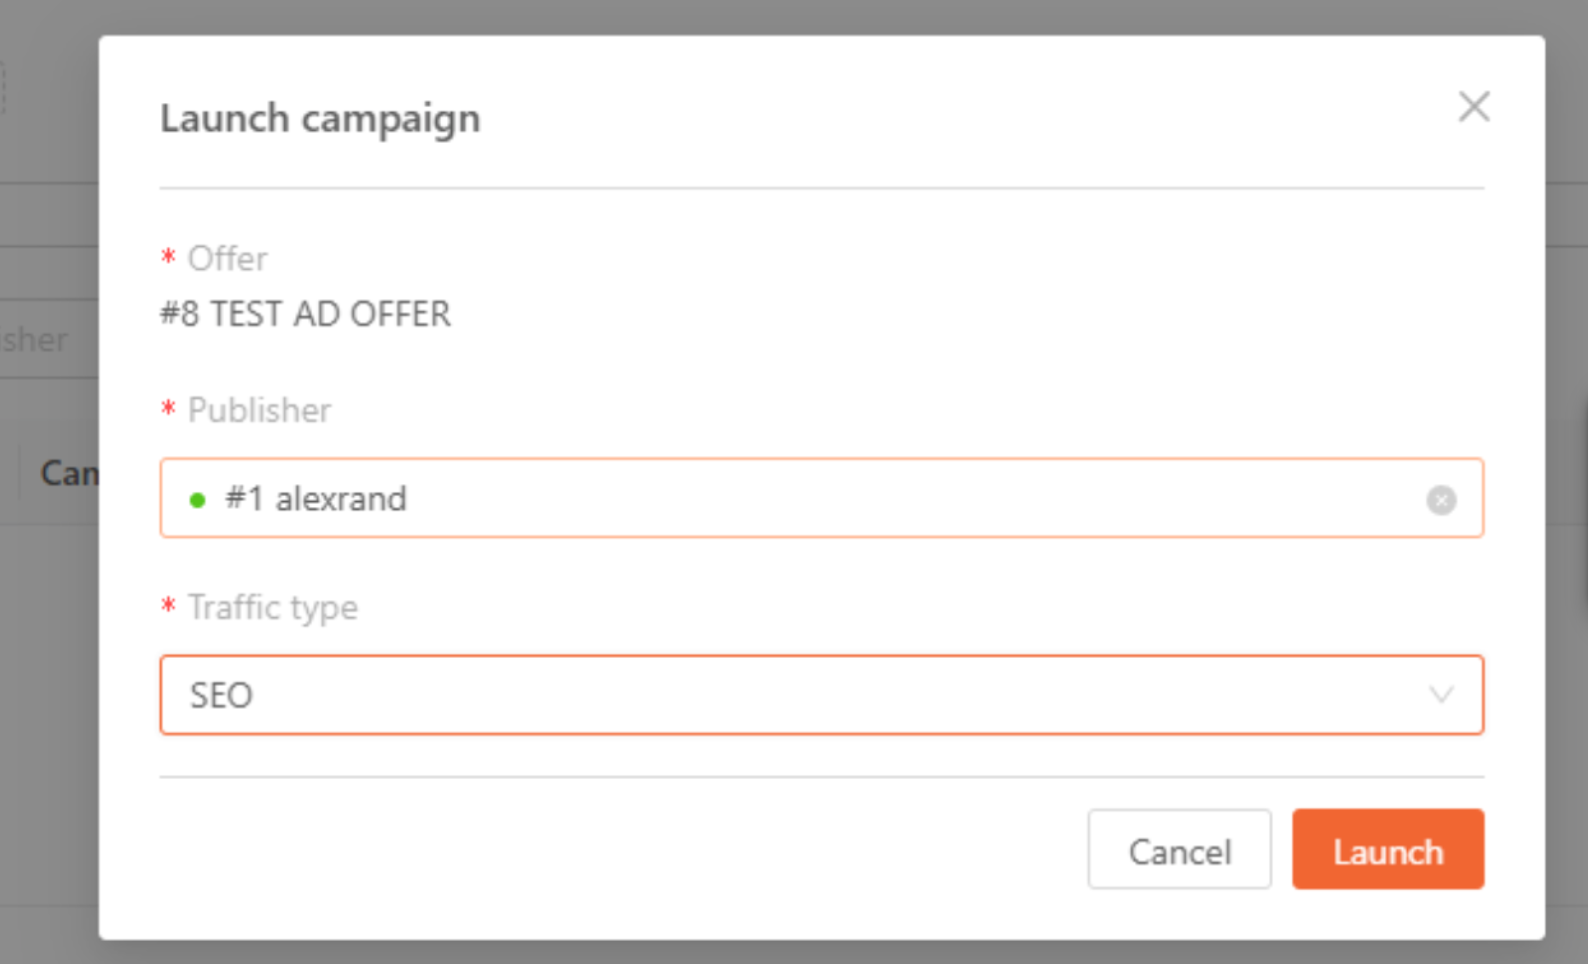
Inside the offer, click + Add
-
Select:
-Offer
-Publisher
-Traffic type
-
Click Launch
This step generates tracking links required for Google Ads.

 Step 6. Configure the campaign in Google Ads
-
Create a campaign in Google Ads
-
Set the Landing URL
-
Open Campaign Settings > Campaign URL options
-
Enter:
Tracking Template - from Ucliq
Final URL Suffix - from Ucliq
-
Save settings
These values can be copied from the Links & Creatives section in Ucliq.
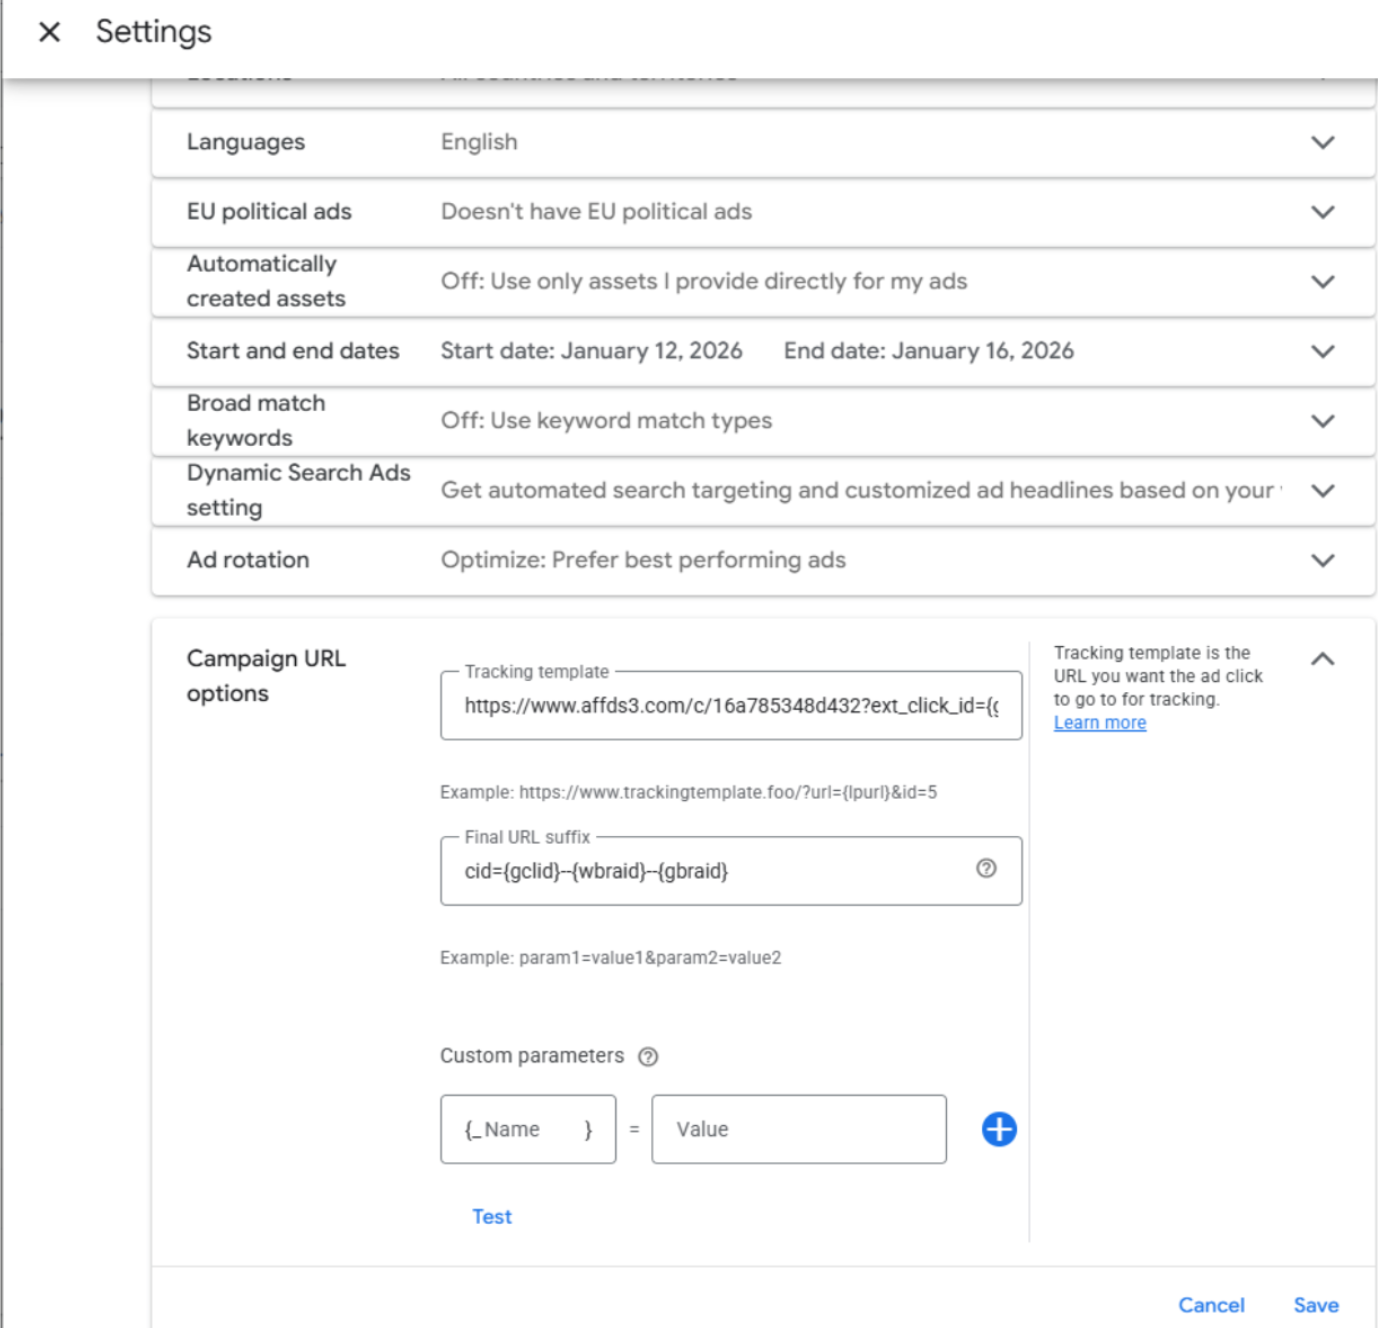
Step 7. Test tracking
-
Click Test in Google Ads
-
Make sure:
-Landing page is found
-Tracking call is successful
Important:
-
The landing page must not redirect to another domain
-
Only HTTPS URLs are allowed

To upload the conversions to Google Ads account go to Publisher Panel > Settings > Traffic Source and click "Add integration" button. There you choose the Google Ads option:
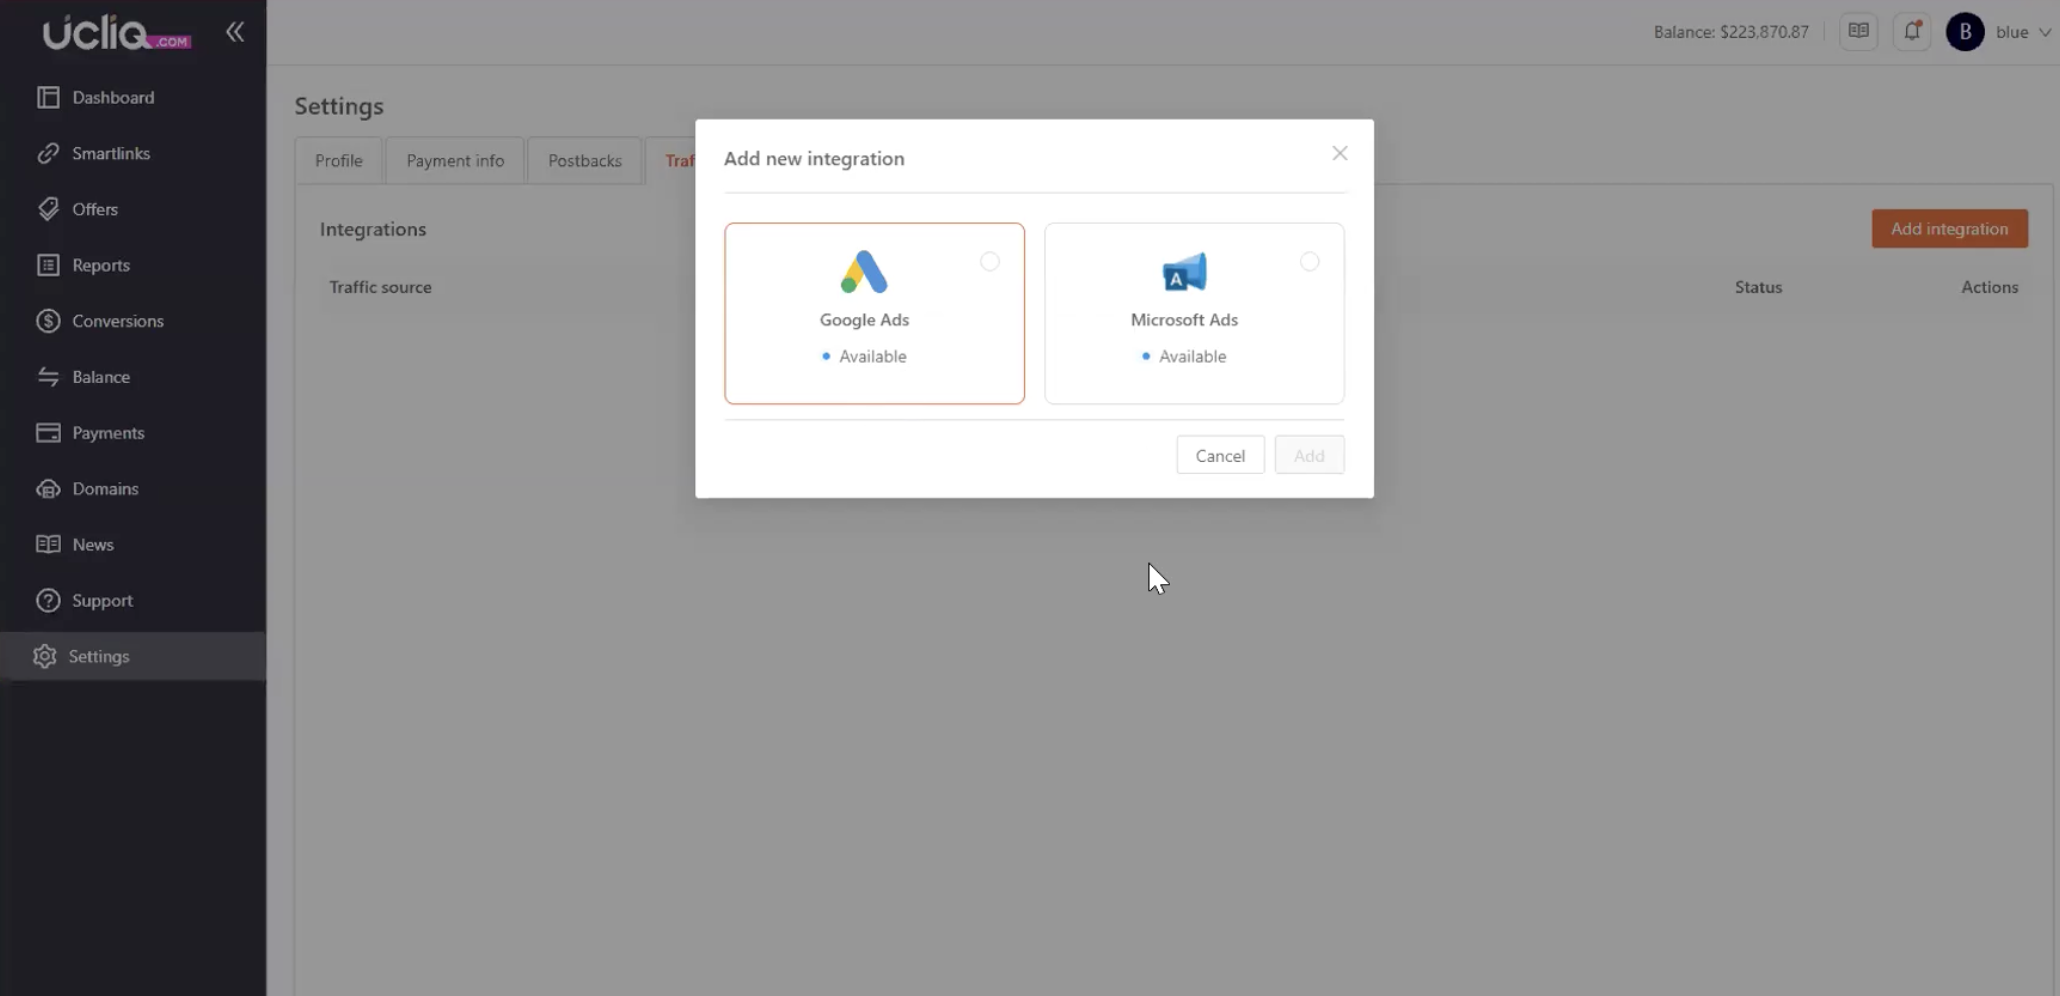
Enter URL, login and password that are displayed when clicking "Edit" button into your Google Ads > Goals > Uploads > Schedules screen and test connection.
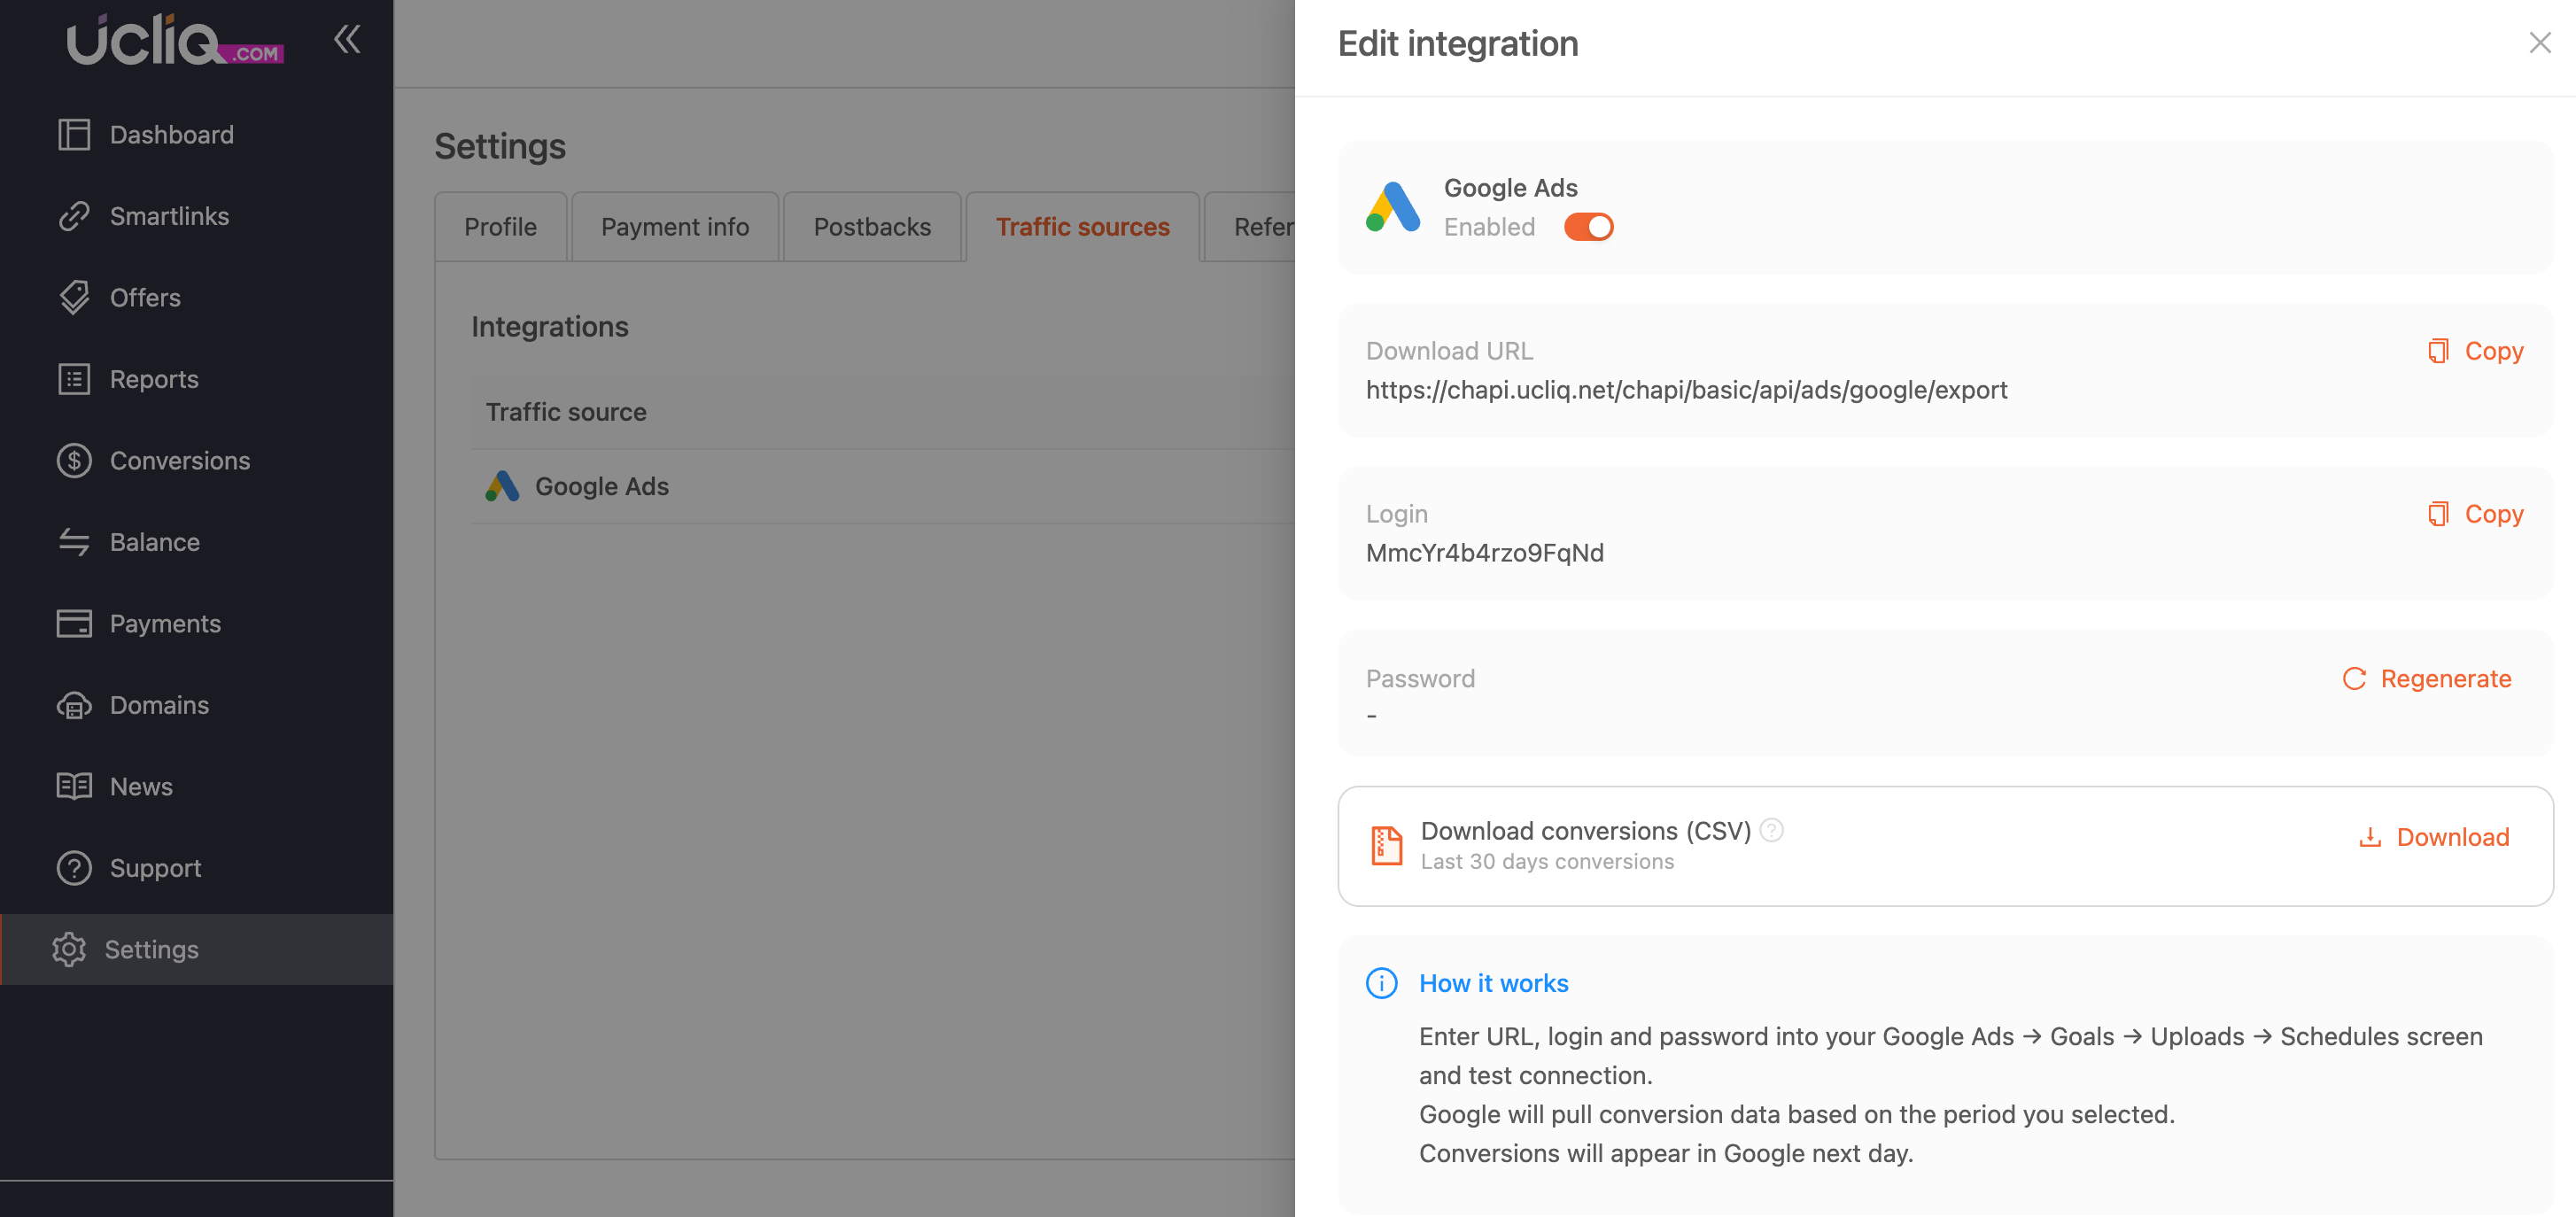 Google will pull conversion data based on the period you selected.
Conversions will appear in Google next day.
Learn more about conversions upload in this article.