1. Setting Up Goals
First you would need to set up the Goals inside Google Ads.
To do so open you https://ads.google.com platform and nagivigate to Goals menu.
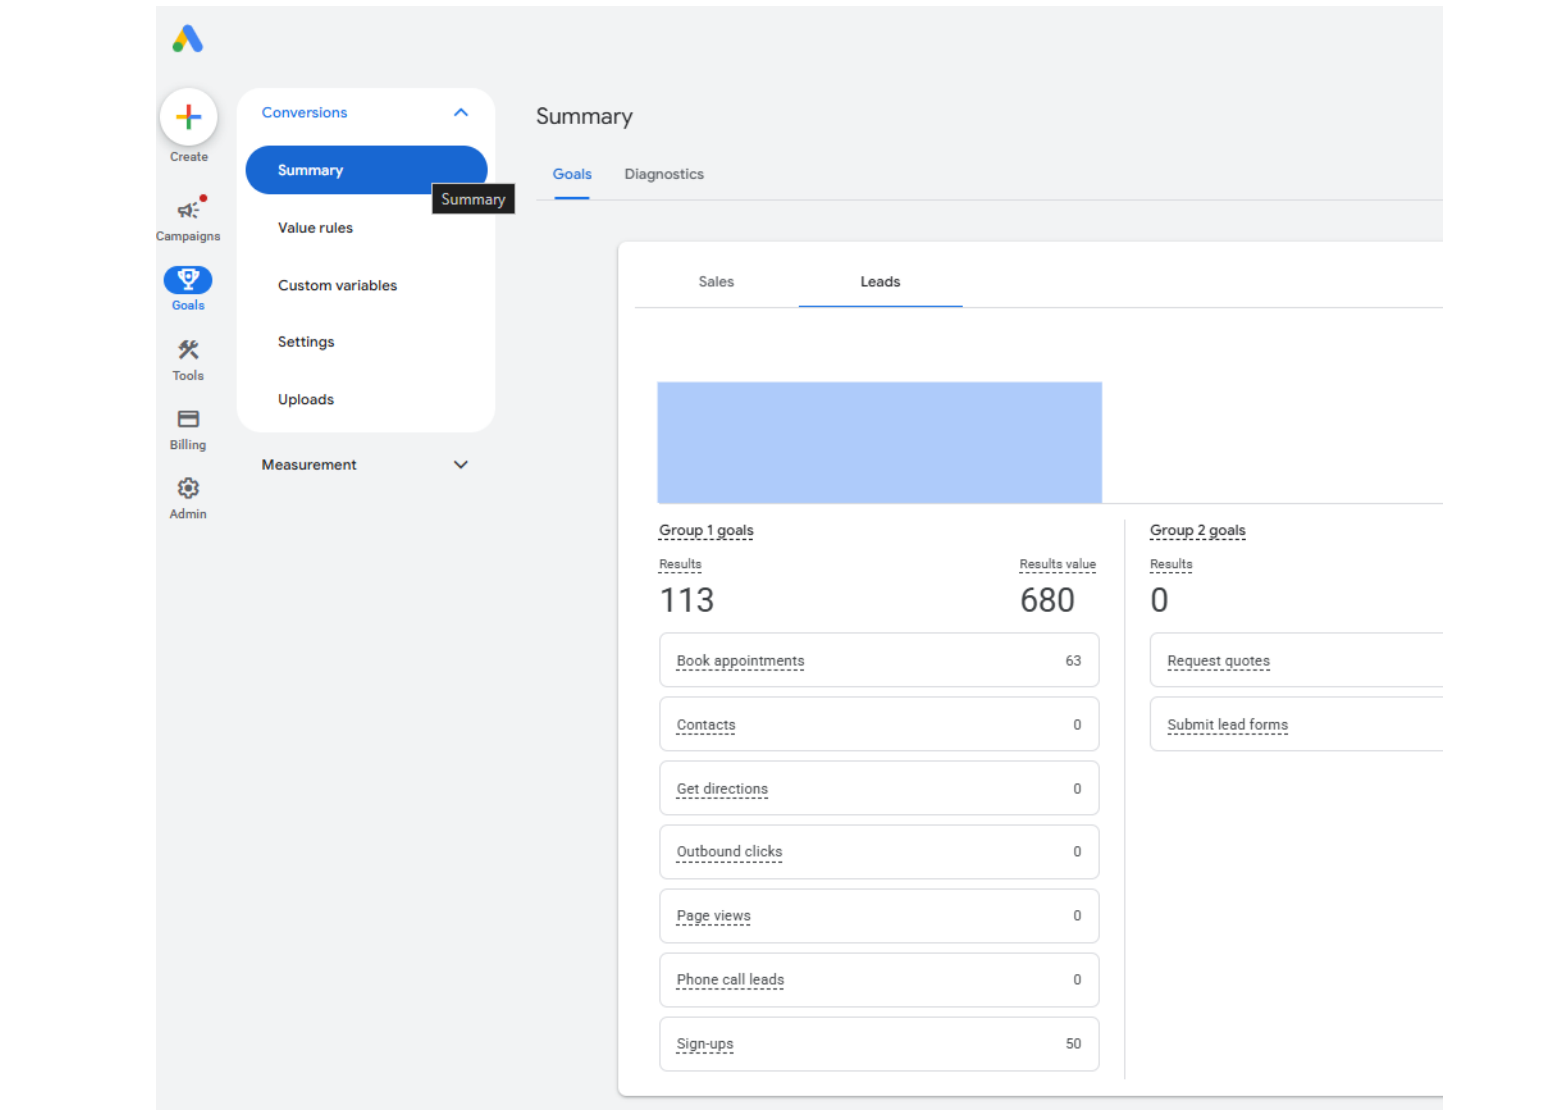
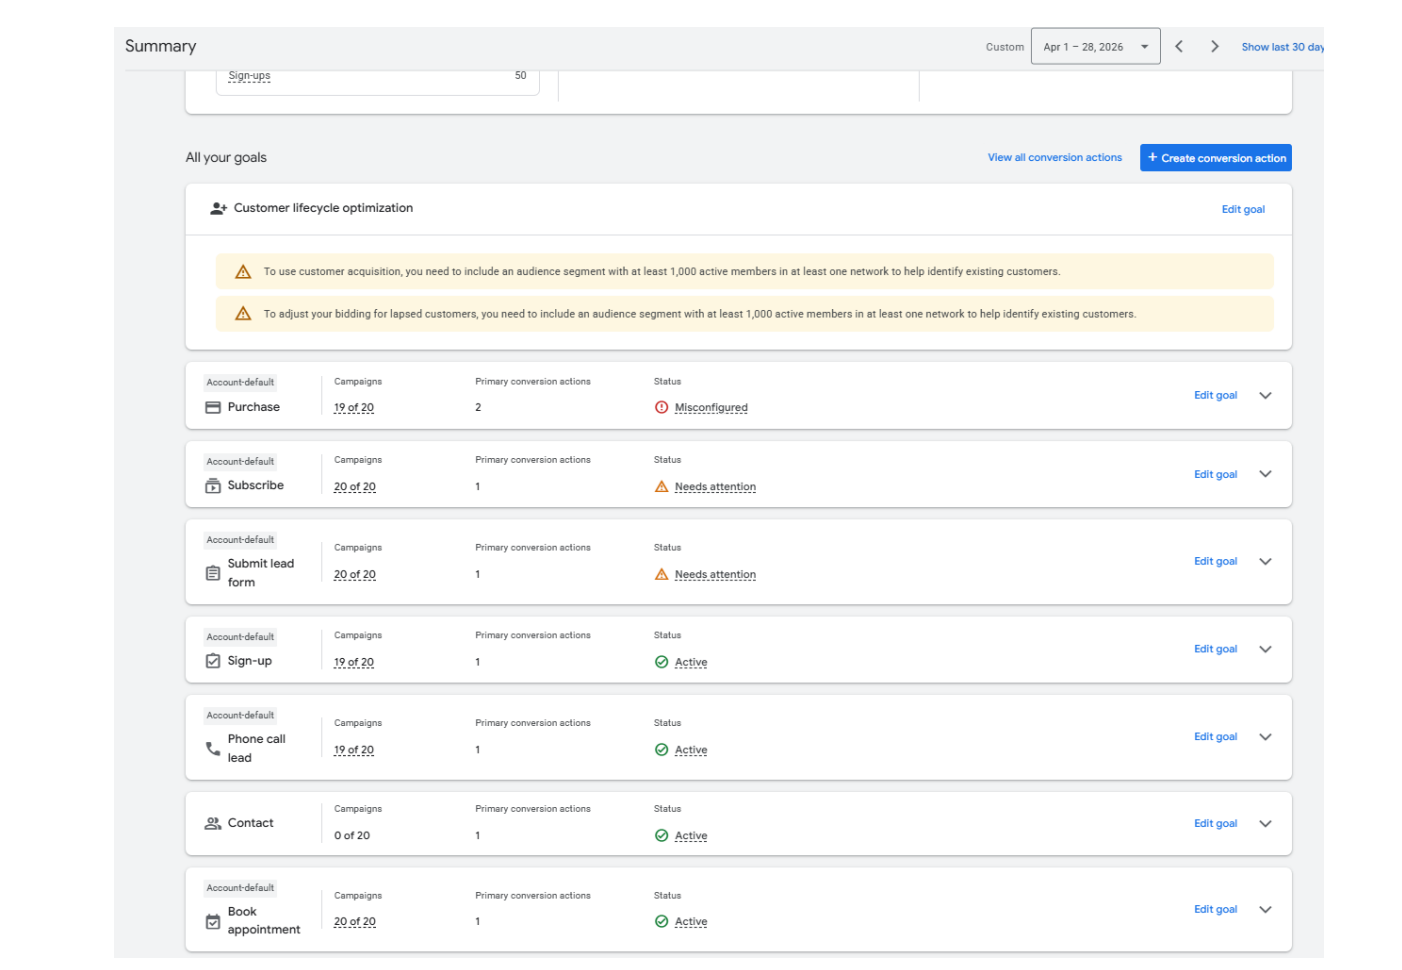
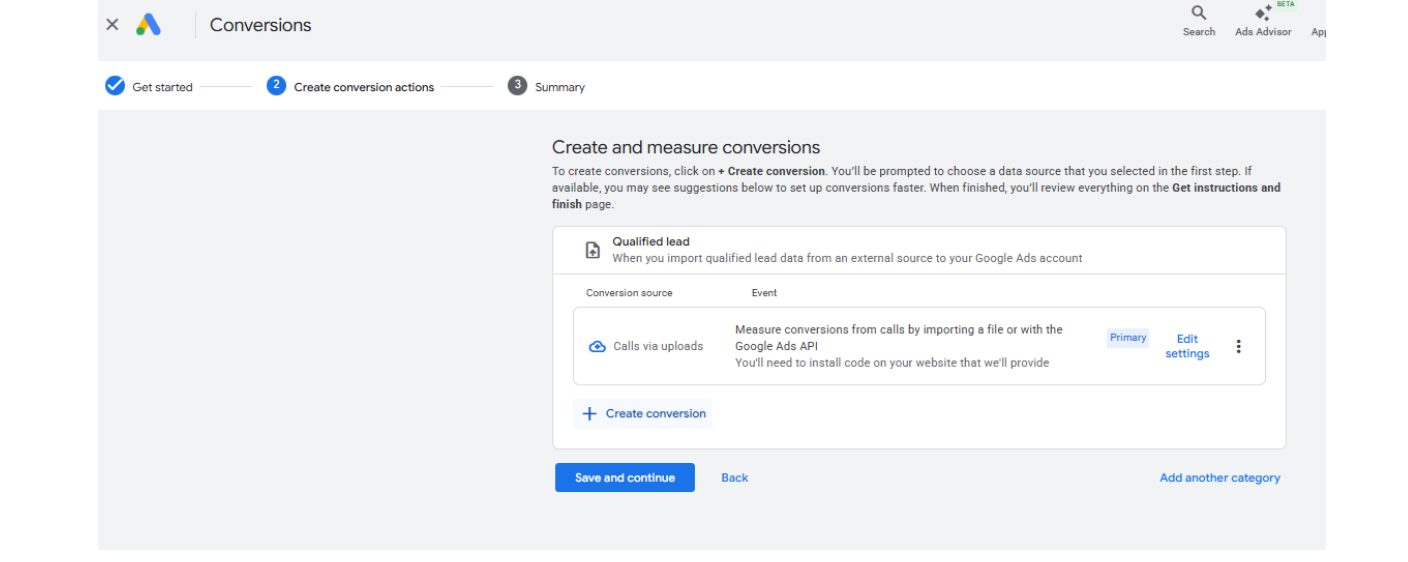
Click on the Summary menu. Find "All your goals" section and click on "+Create conversion section".
Google Ads structure:
-
Goal = general category
-
Action = specific conversion event
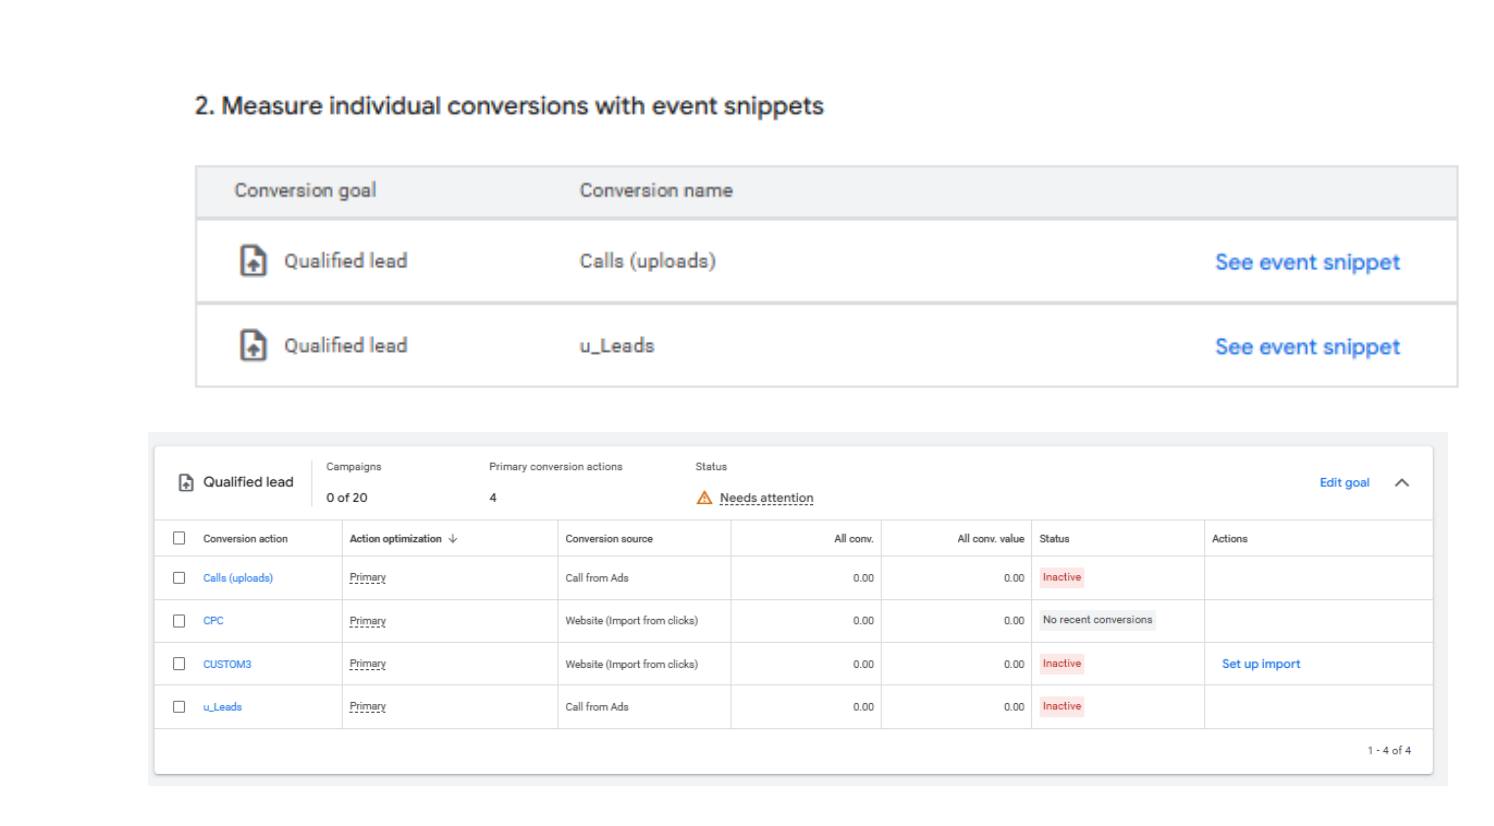
Your Google Ads Action names must match UCLIQ Goal Titles exactly.
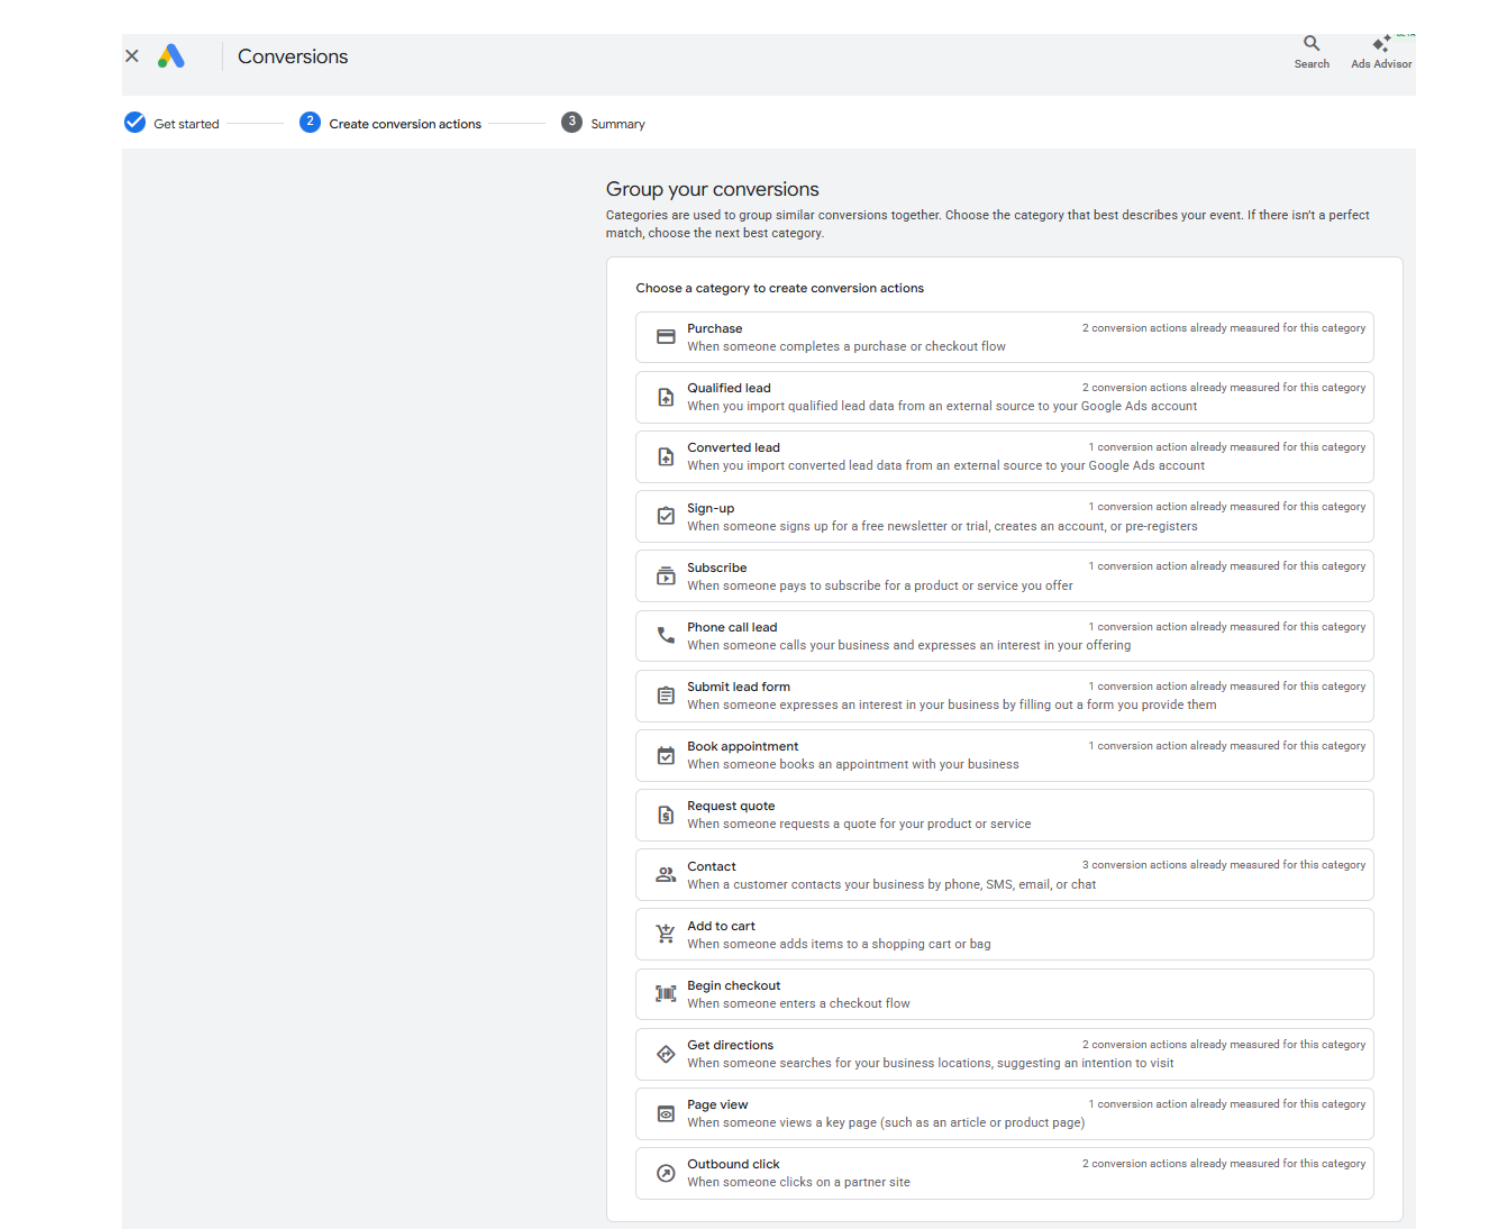 Click on the selected Goal to add and Action.
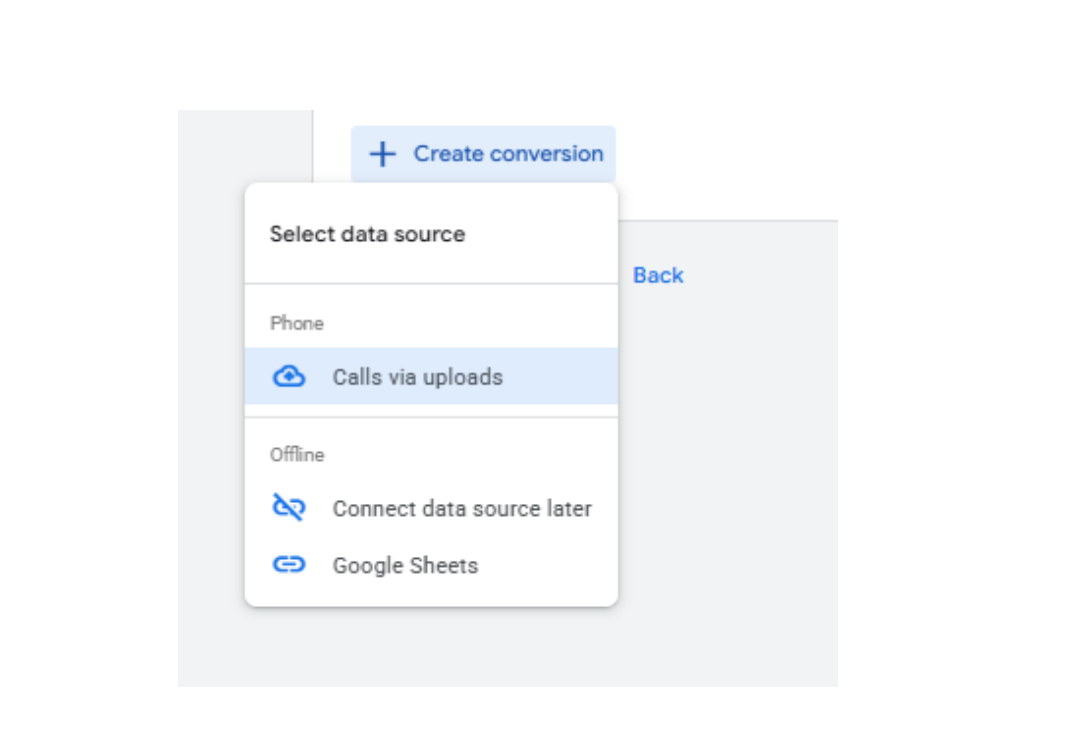
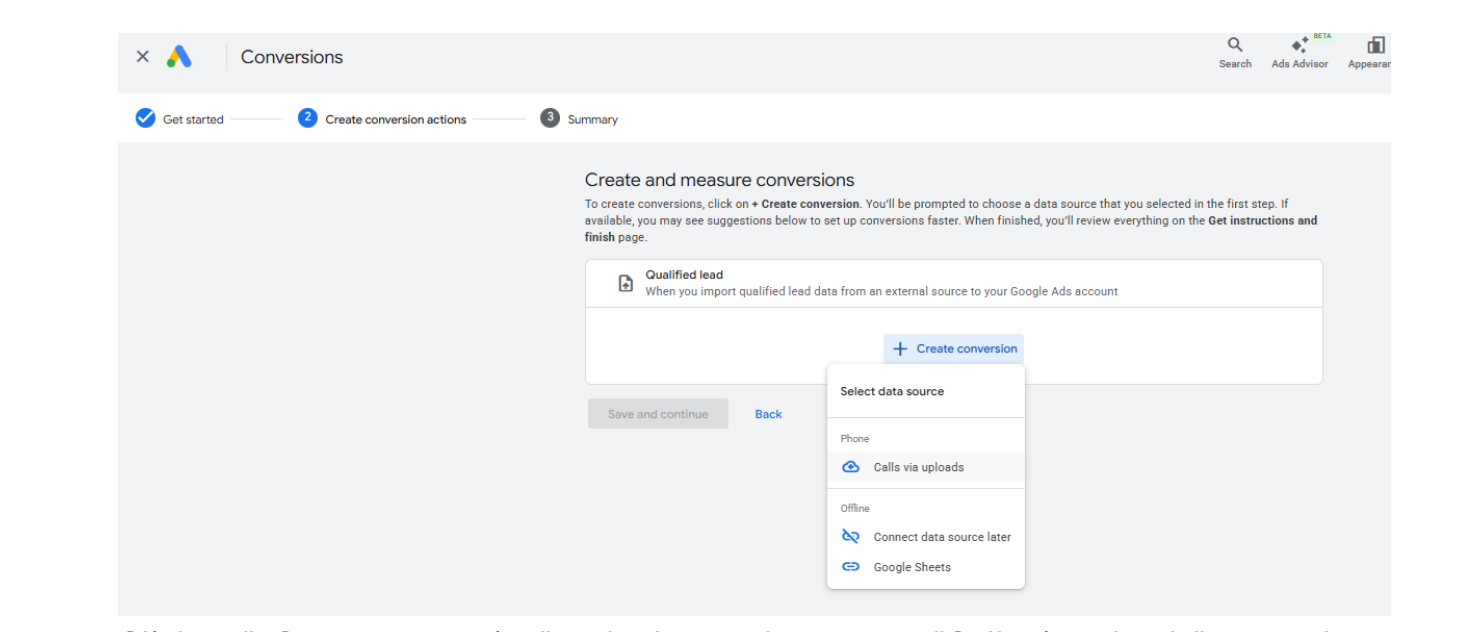 Click on "+Create conversion" and select update type as "Calls via uploads" to match external data upload. This has nothing to do with calls - just outdated legacy Google Ads naming. That is required for uploading conversions via files or API.
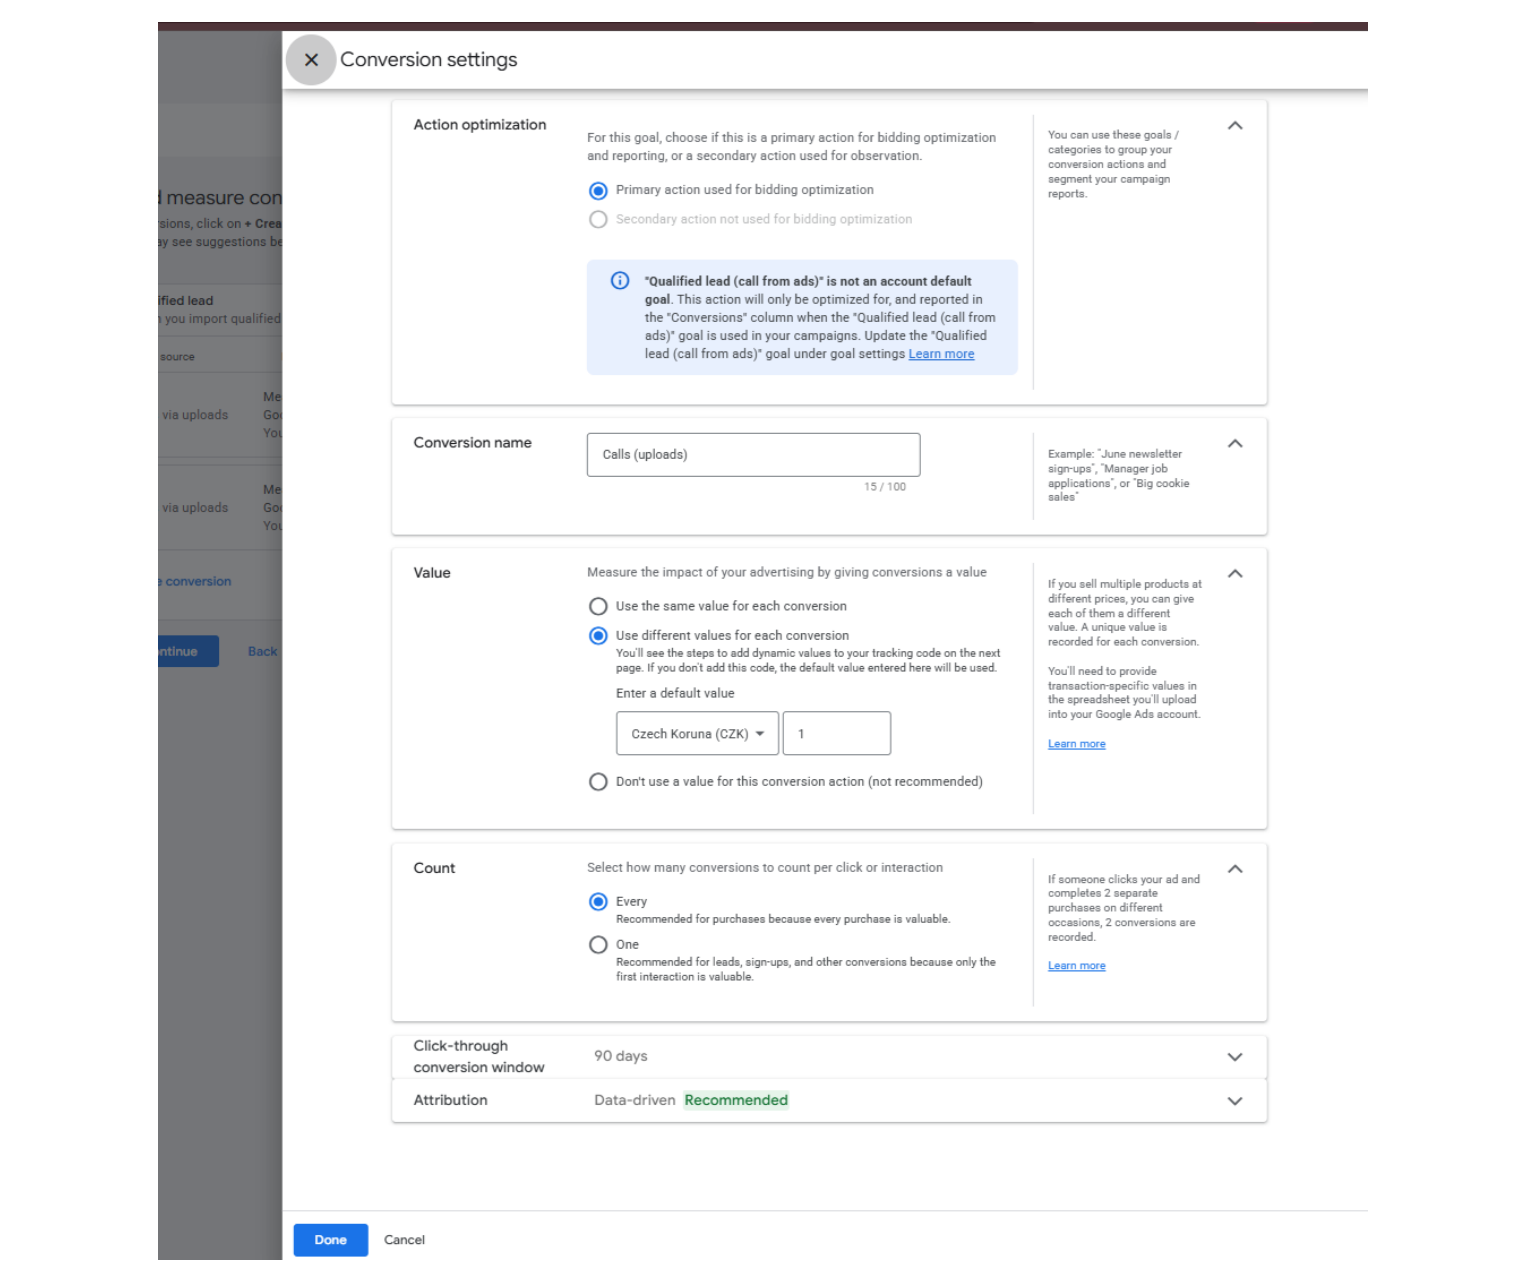
 Set your Conversion Action name to match one of the predefined UCLIQ Goal Titles for Google Ads offers. Select default amount, usually it is best to set it as "Use different amounts" and set value to 0. Set Count to "Every".
 Refer to the custom goals list in the Google Ads offer, Goal section - you have a selection of fixed custom goals.
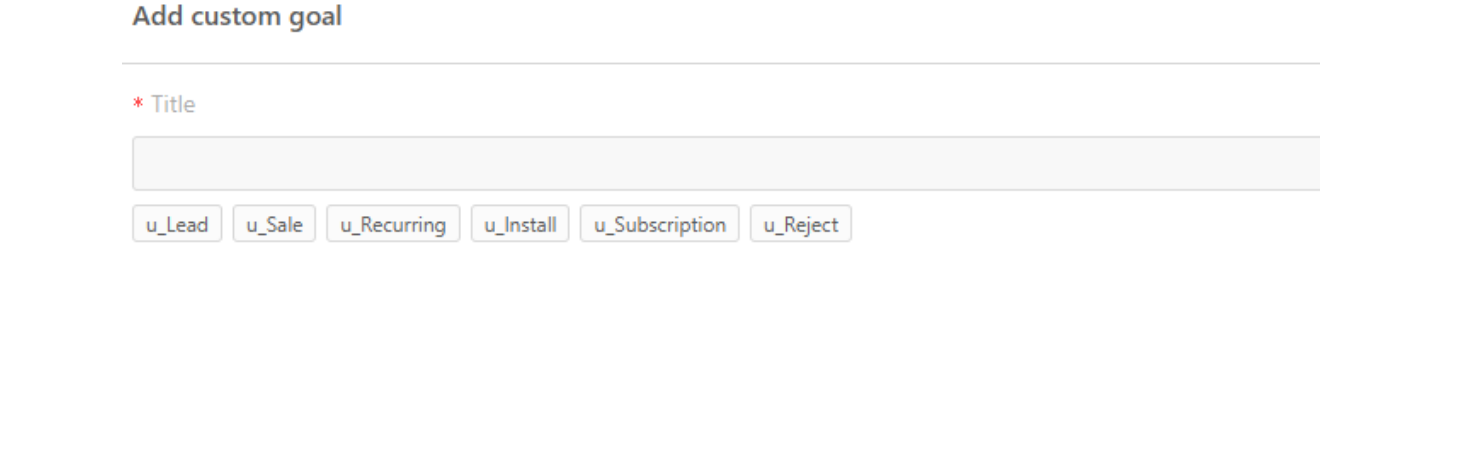
Setup one or several custom Google Ads goals (instruct your publishers which goals you will be using in the offer):
• u_Lead - best use for non-paid registrations
• u_Sale - best use for paid goods or services (one off)
• u_Recurring - best use for periodically charged services
• u_Install - best use for app installs
• u_Subscription - best use for app subscriptions
• u_Reject - best use for vetted actions, like credit allocations, payout requests,
etc
 Your created conversion action will appear either immediately or after a delay, can be as large as 30 minutes - totally depends on Google Ads busyness at this very moment. You can continue with creating other goals and verify all of them at once at the end, so you don't have to sit and wait.
 Your created conversion actions (Ucliq Goals) will appear as "Inactive" until you actually upload first conversions and they get processed then it will say "Active".
 2. Uploading Conversions
Now lets configure your Google Ads conversion upload, test and schedule. Navigate to Goals->Uploads section of Google Ads portal.
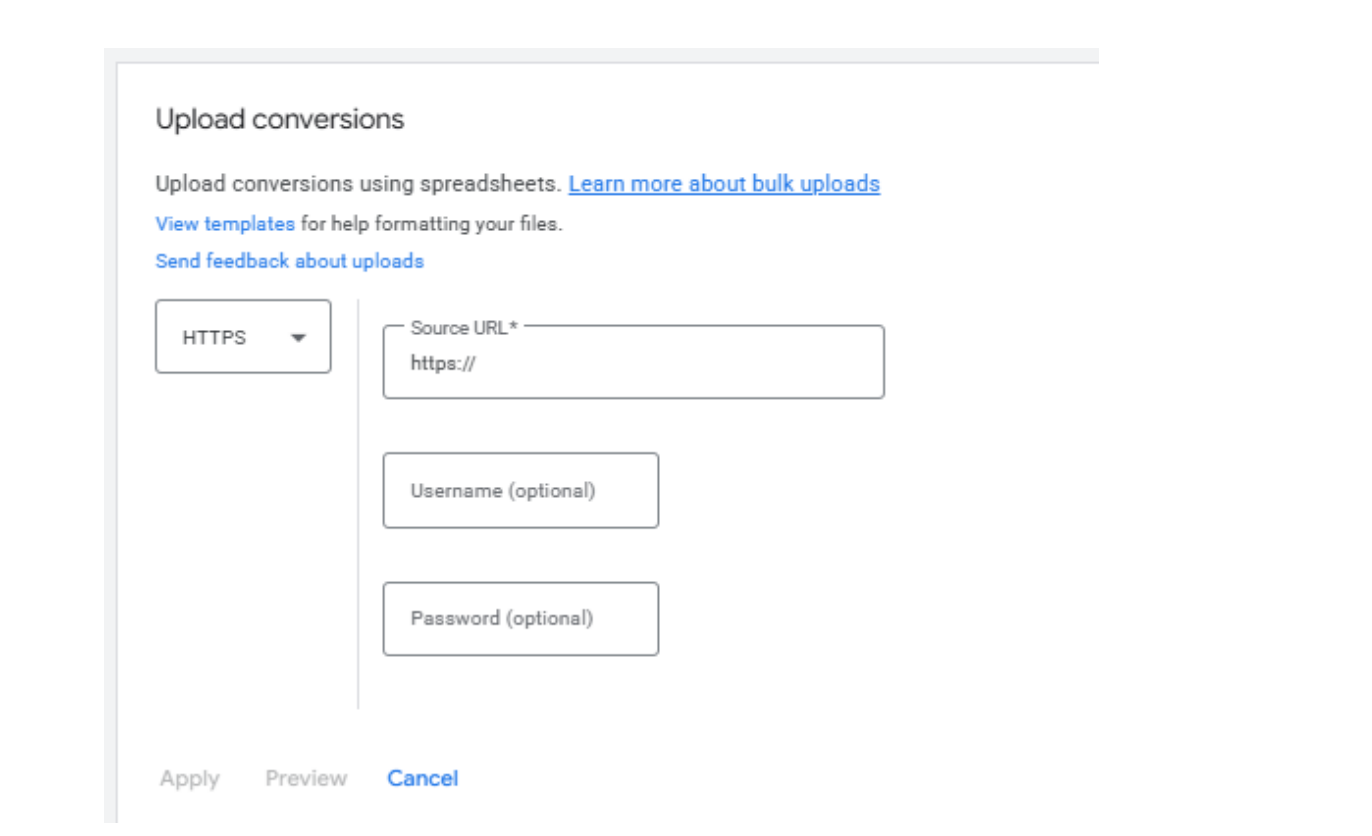
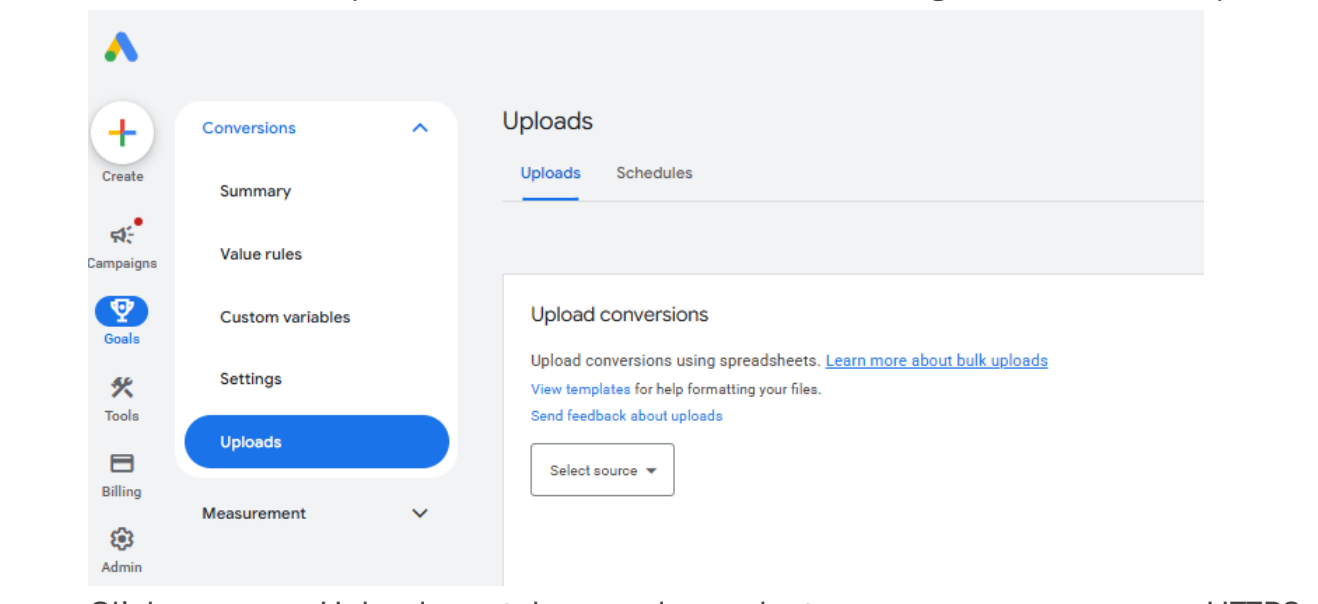 Click on Uploads tab and select a source as HTTPS.
 Now open up your UCLIQ Publisher Portal page. Navigate to Settings > Traffic sources.
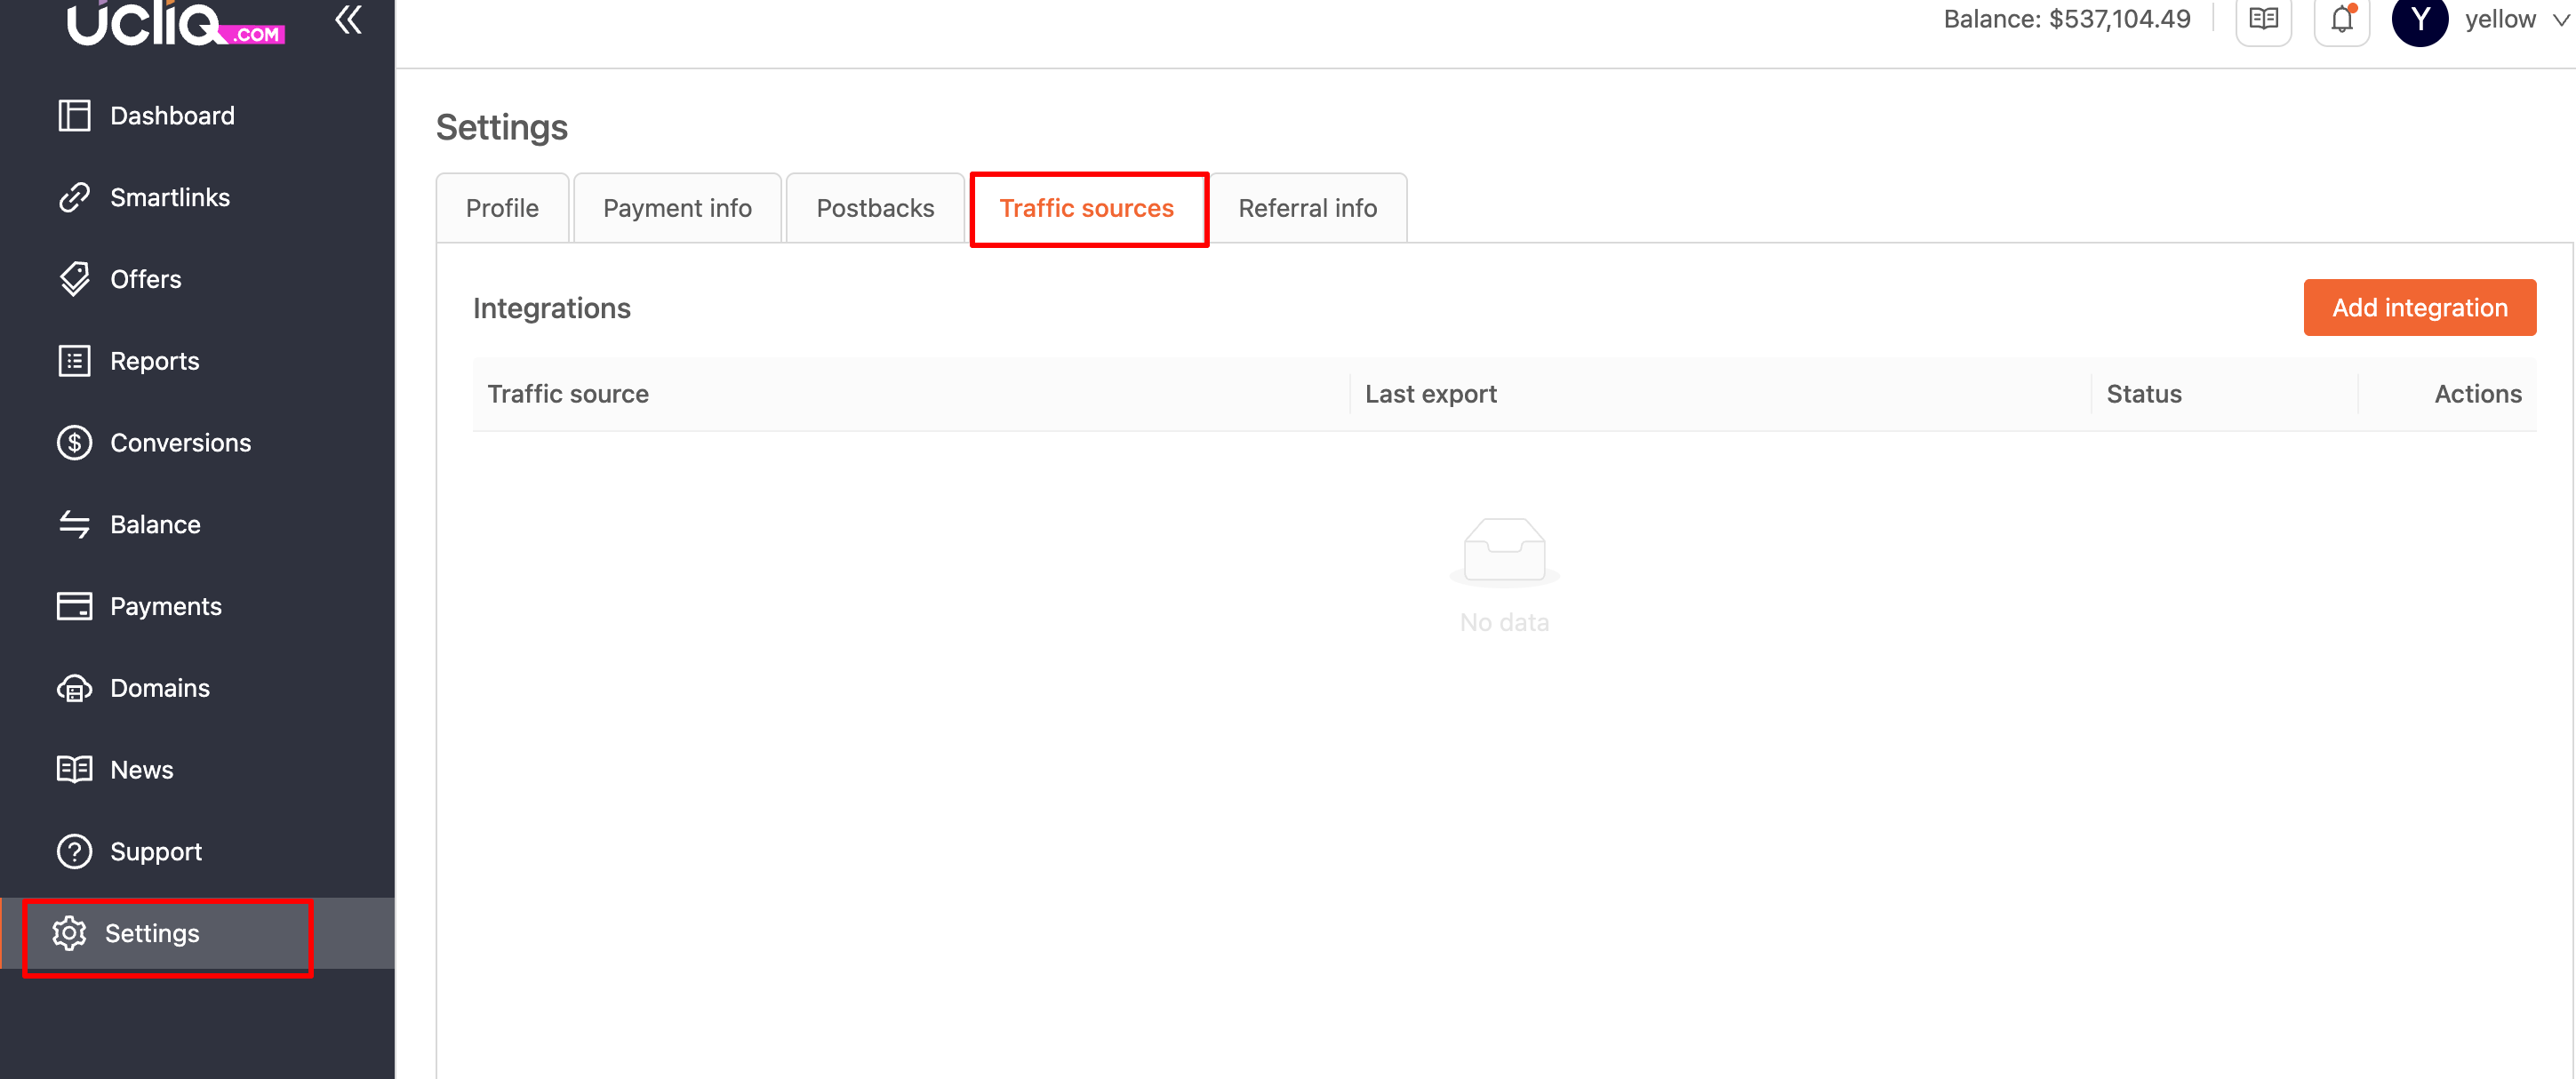
Click on Add New Integration and enable Google Ads, click Add.

Your panel will show you credentials you need to copy and enter at the Google Ads page. Please safekeep your download password - you won't be able to recover it, only to regenerate, which will deactivate your previously configured downloads, so you will have to update it.
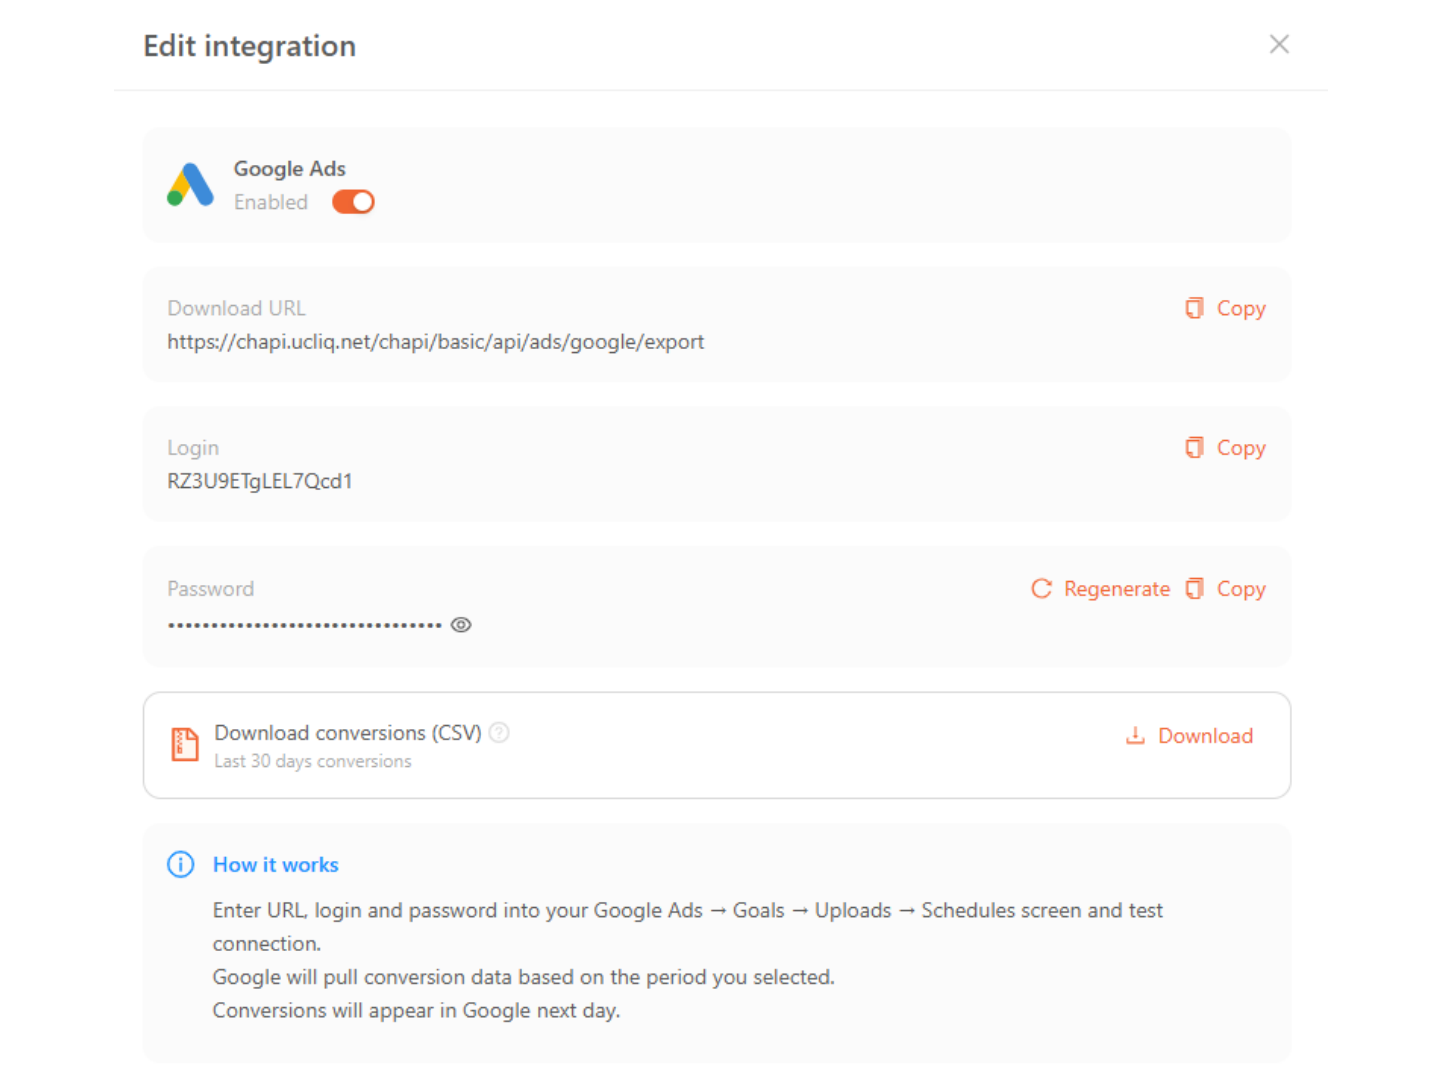
Enter the URL, Login, Password on the Google Ads Uploads page.
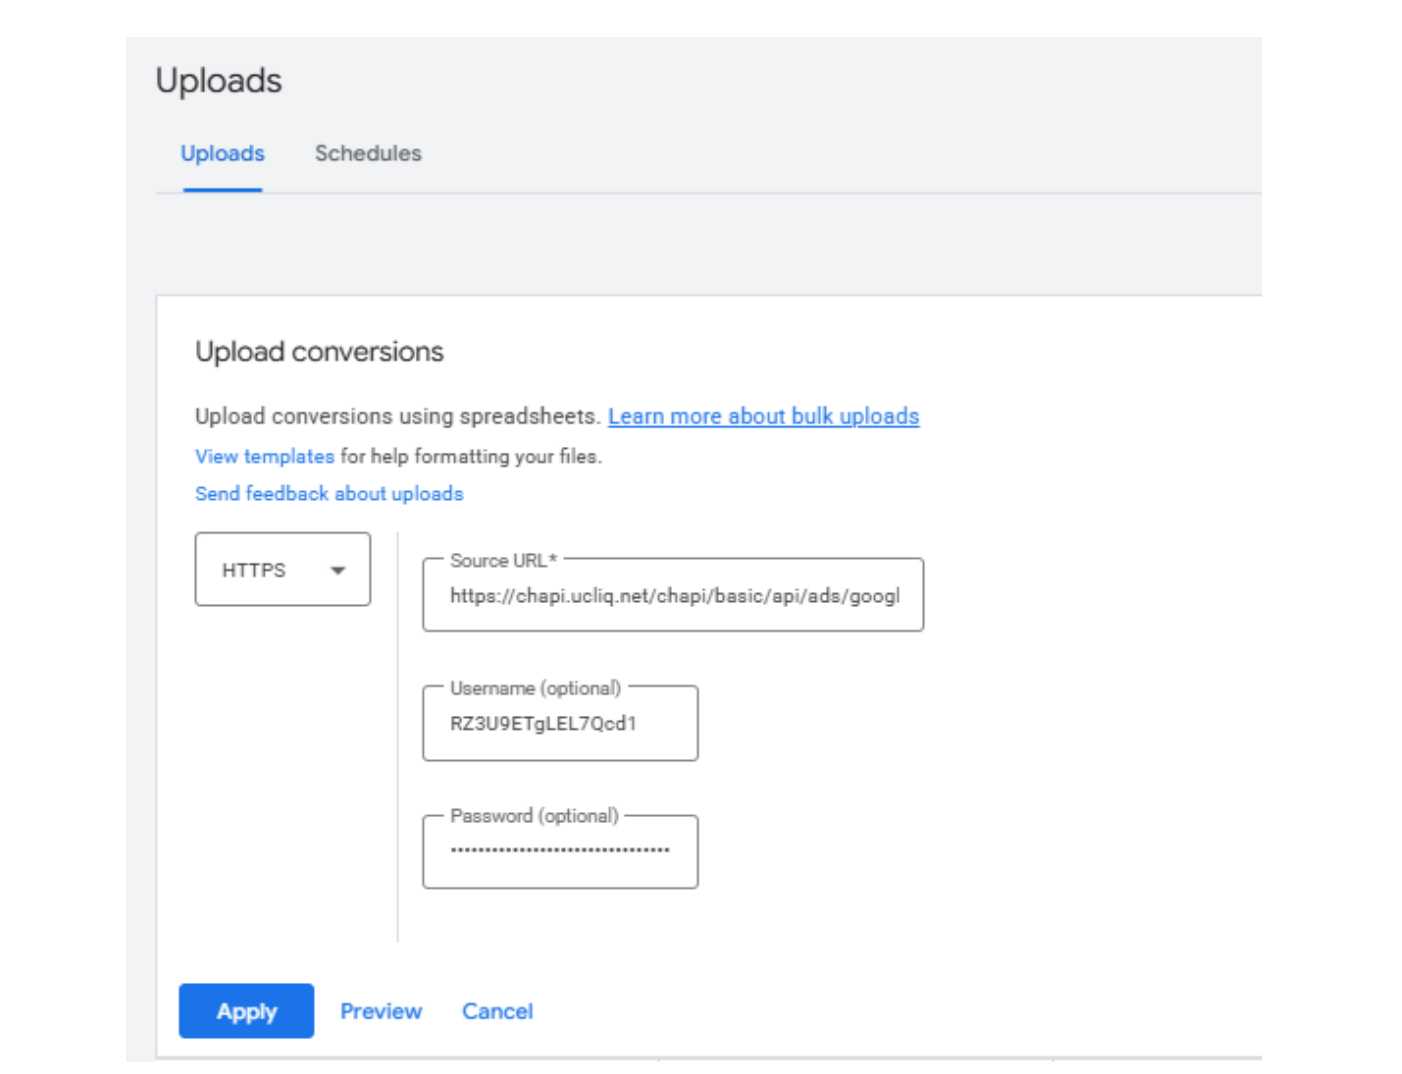
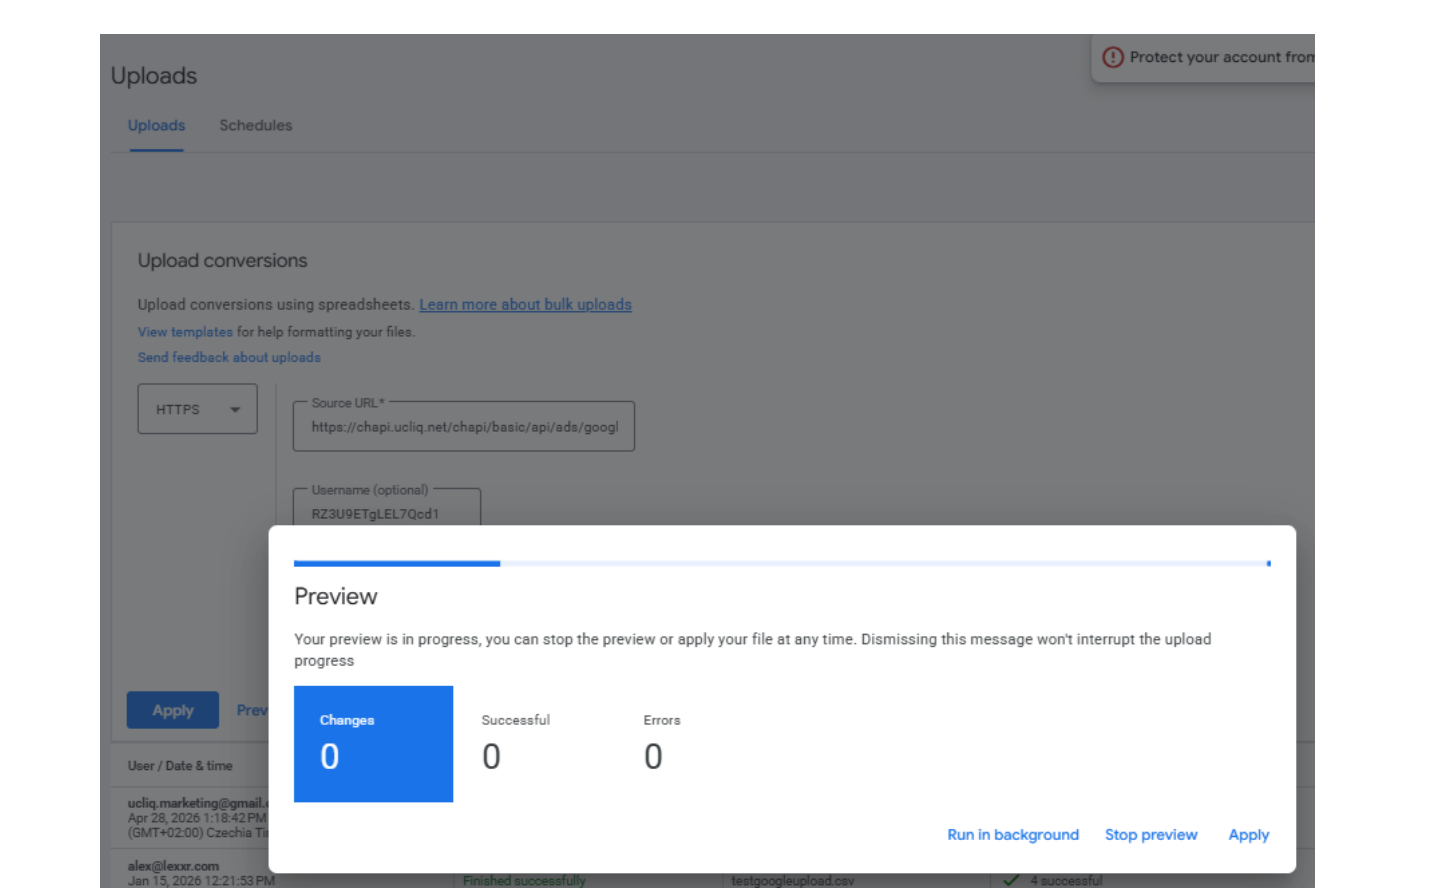
Click on Preview to validate your login credentials. Once Google logins to the UCLIQ system with your credentials you will see a confirmation. Then you can click Apply.
Configure Automatic Schedule
Set:
-
Automatic downloads every 24 hours
-
Preferably during low-traffic hours
UCLIQ provides:
-
Automatic export for last 7 days
-
Manual export for last 30 days
Google automatically removes duplicate conversions based on:
-
gclid
-
conversion action
-
timestamp
Important Notes
Google does not accept conversions older than 30 days. Conversion propagation inside Google Ads may take 24-48 hours. This delay cannot be accelerated.