Adding publishers to UCLIQ is a straightforward process that ensures your campaigns reach the right audience. Follow these steps to onboard new publishers efficiently:
Manually Create a Publisher:
Go to Publishers > click the “New publisher” button
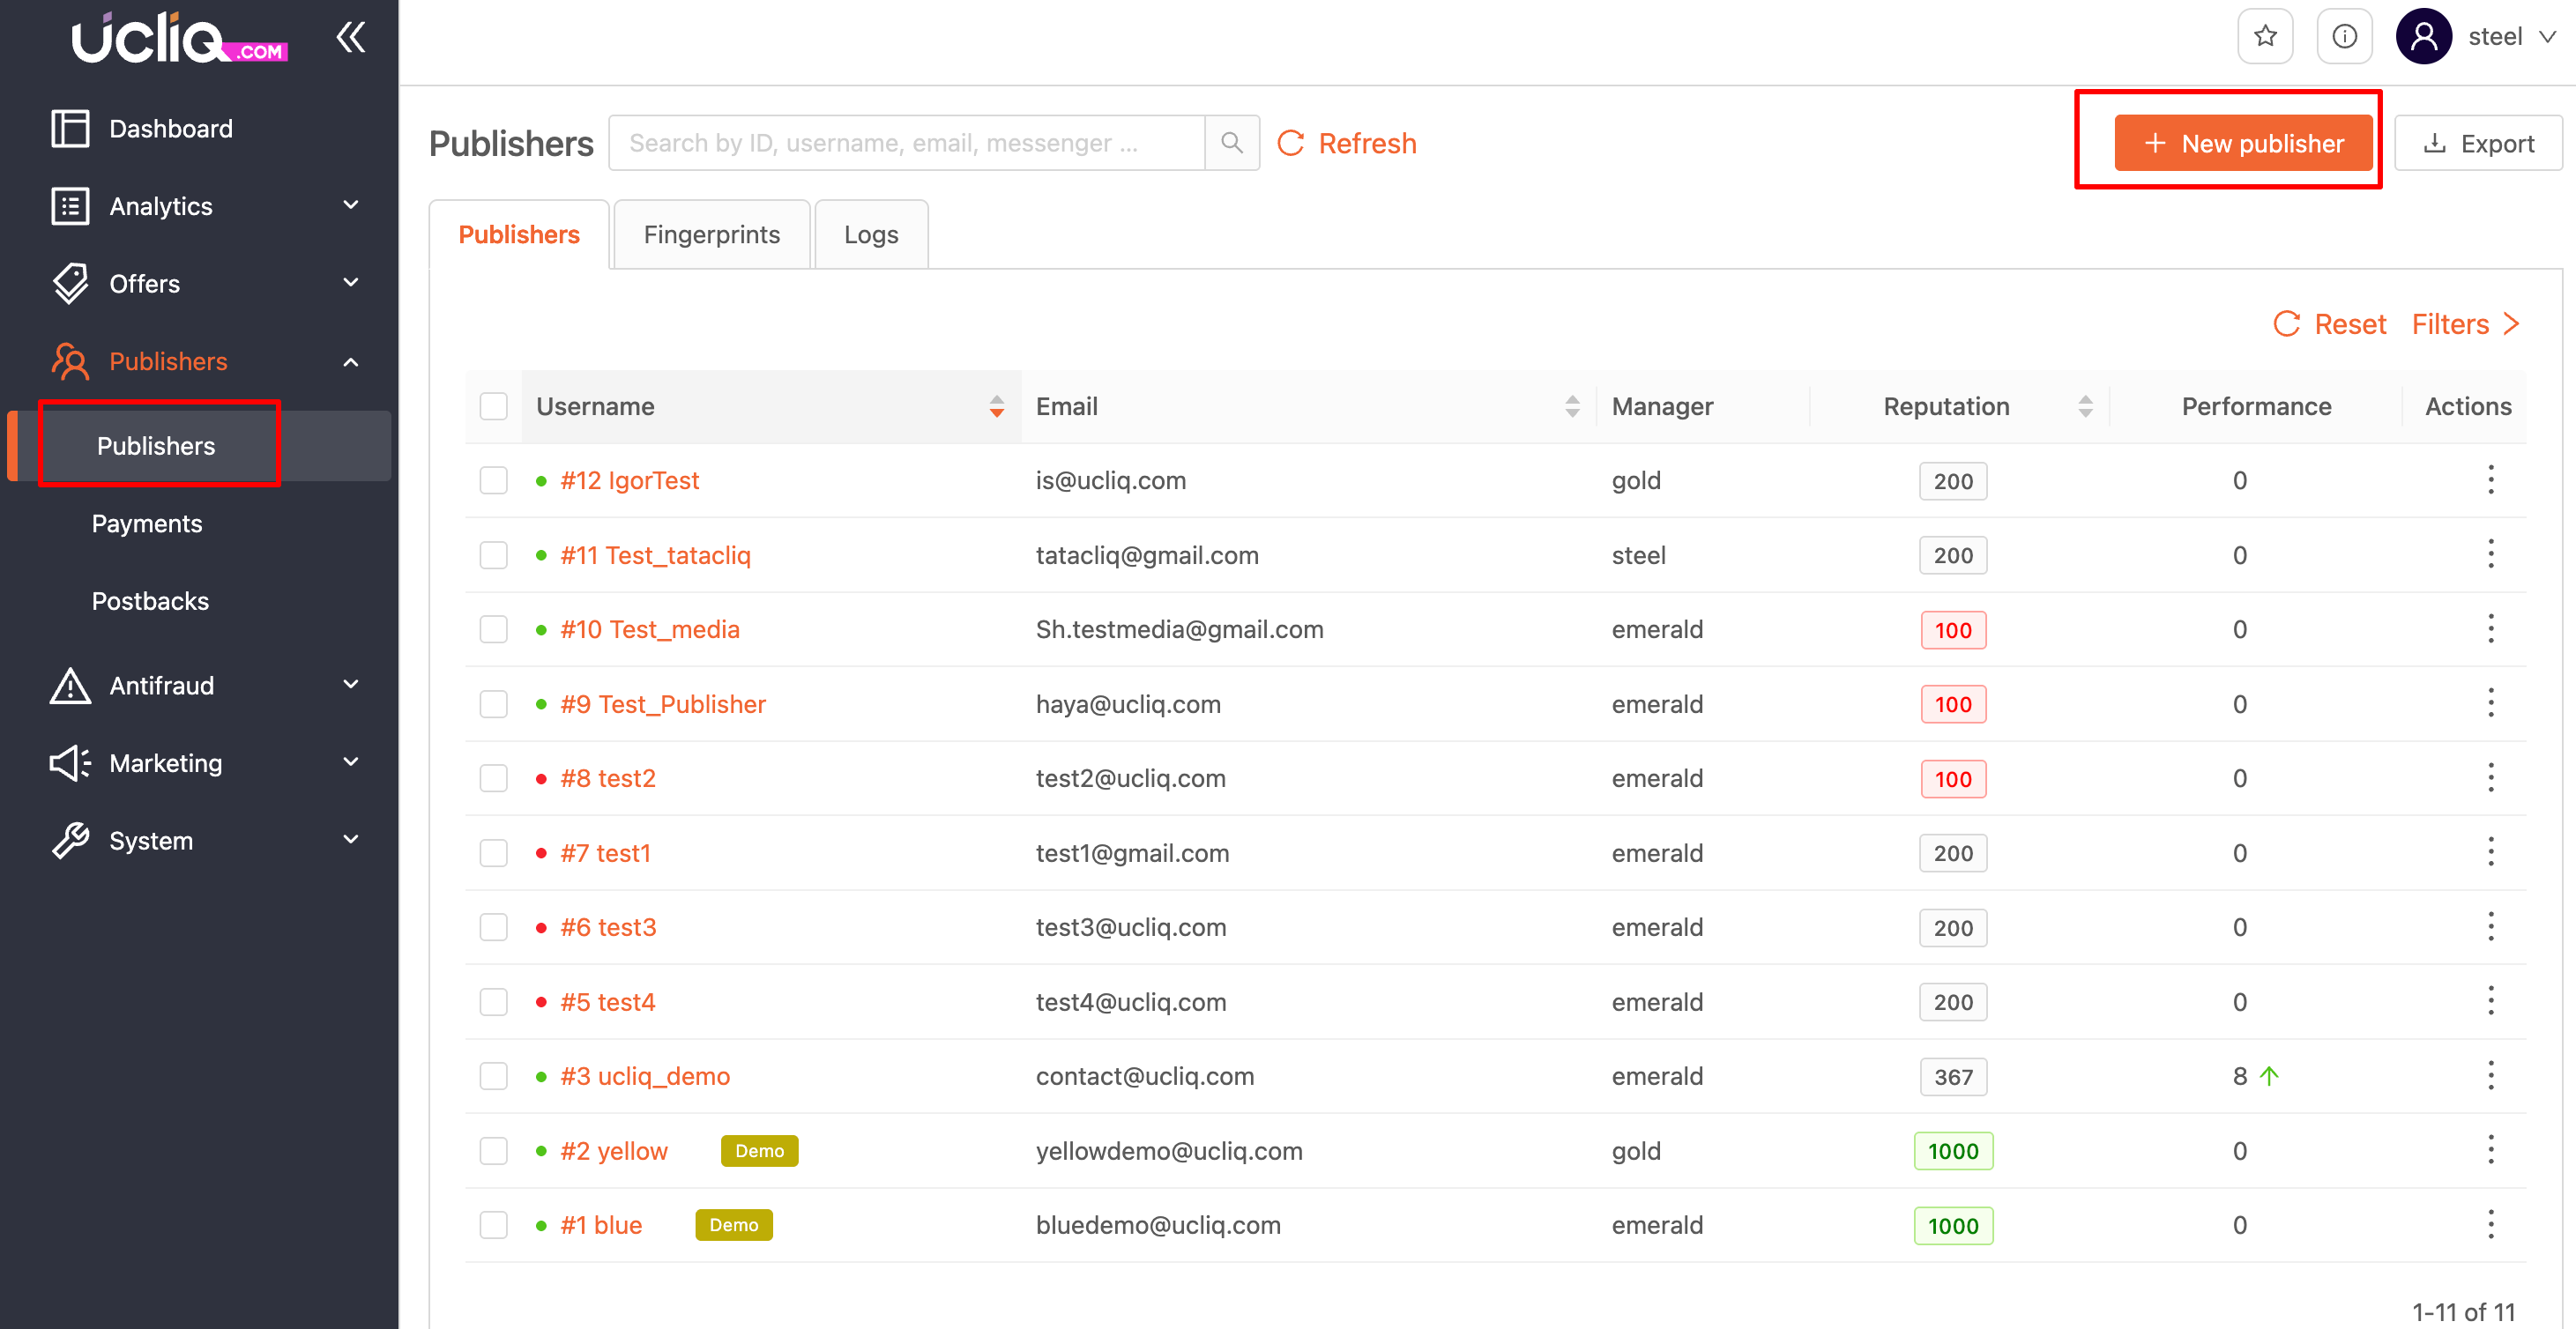
Clicking it will open a new form to input publisher details:

Provide the following mandatory information:
-
Name: The publisher’s name or business name.
-
Email Address: An active email for communication and login credentials.
-
Payment Details: Add the preferred payment method (bank transfer, PayPal, etc.).
-
Targeting Information: Specify if the publisher targets specific geographies or verticals.
Optional fields might include:
-Company website.
-Contact phone number.
-Custom tags or labels for easier filtering and management.
Once all required fields are completed, click Save.
The system will notify you if any mandatory information is missing.
After saving, UCLIQ can automatically send an email with login credentials to the publisher’s registered email address. Ensure the publisher receives and confirms their account details.
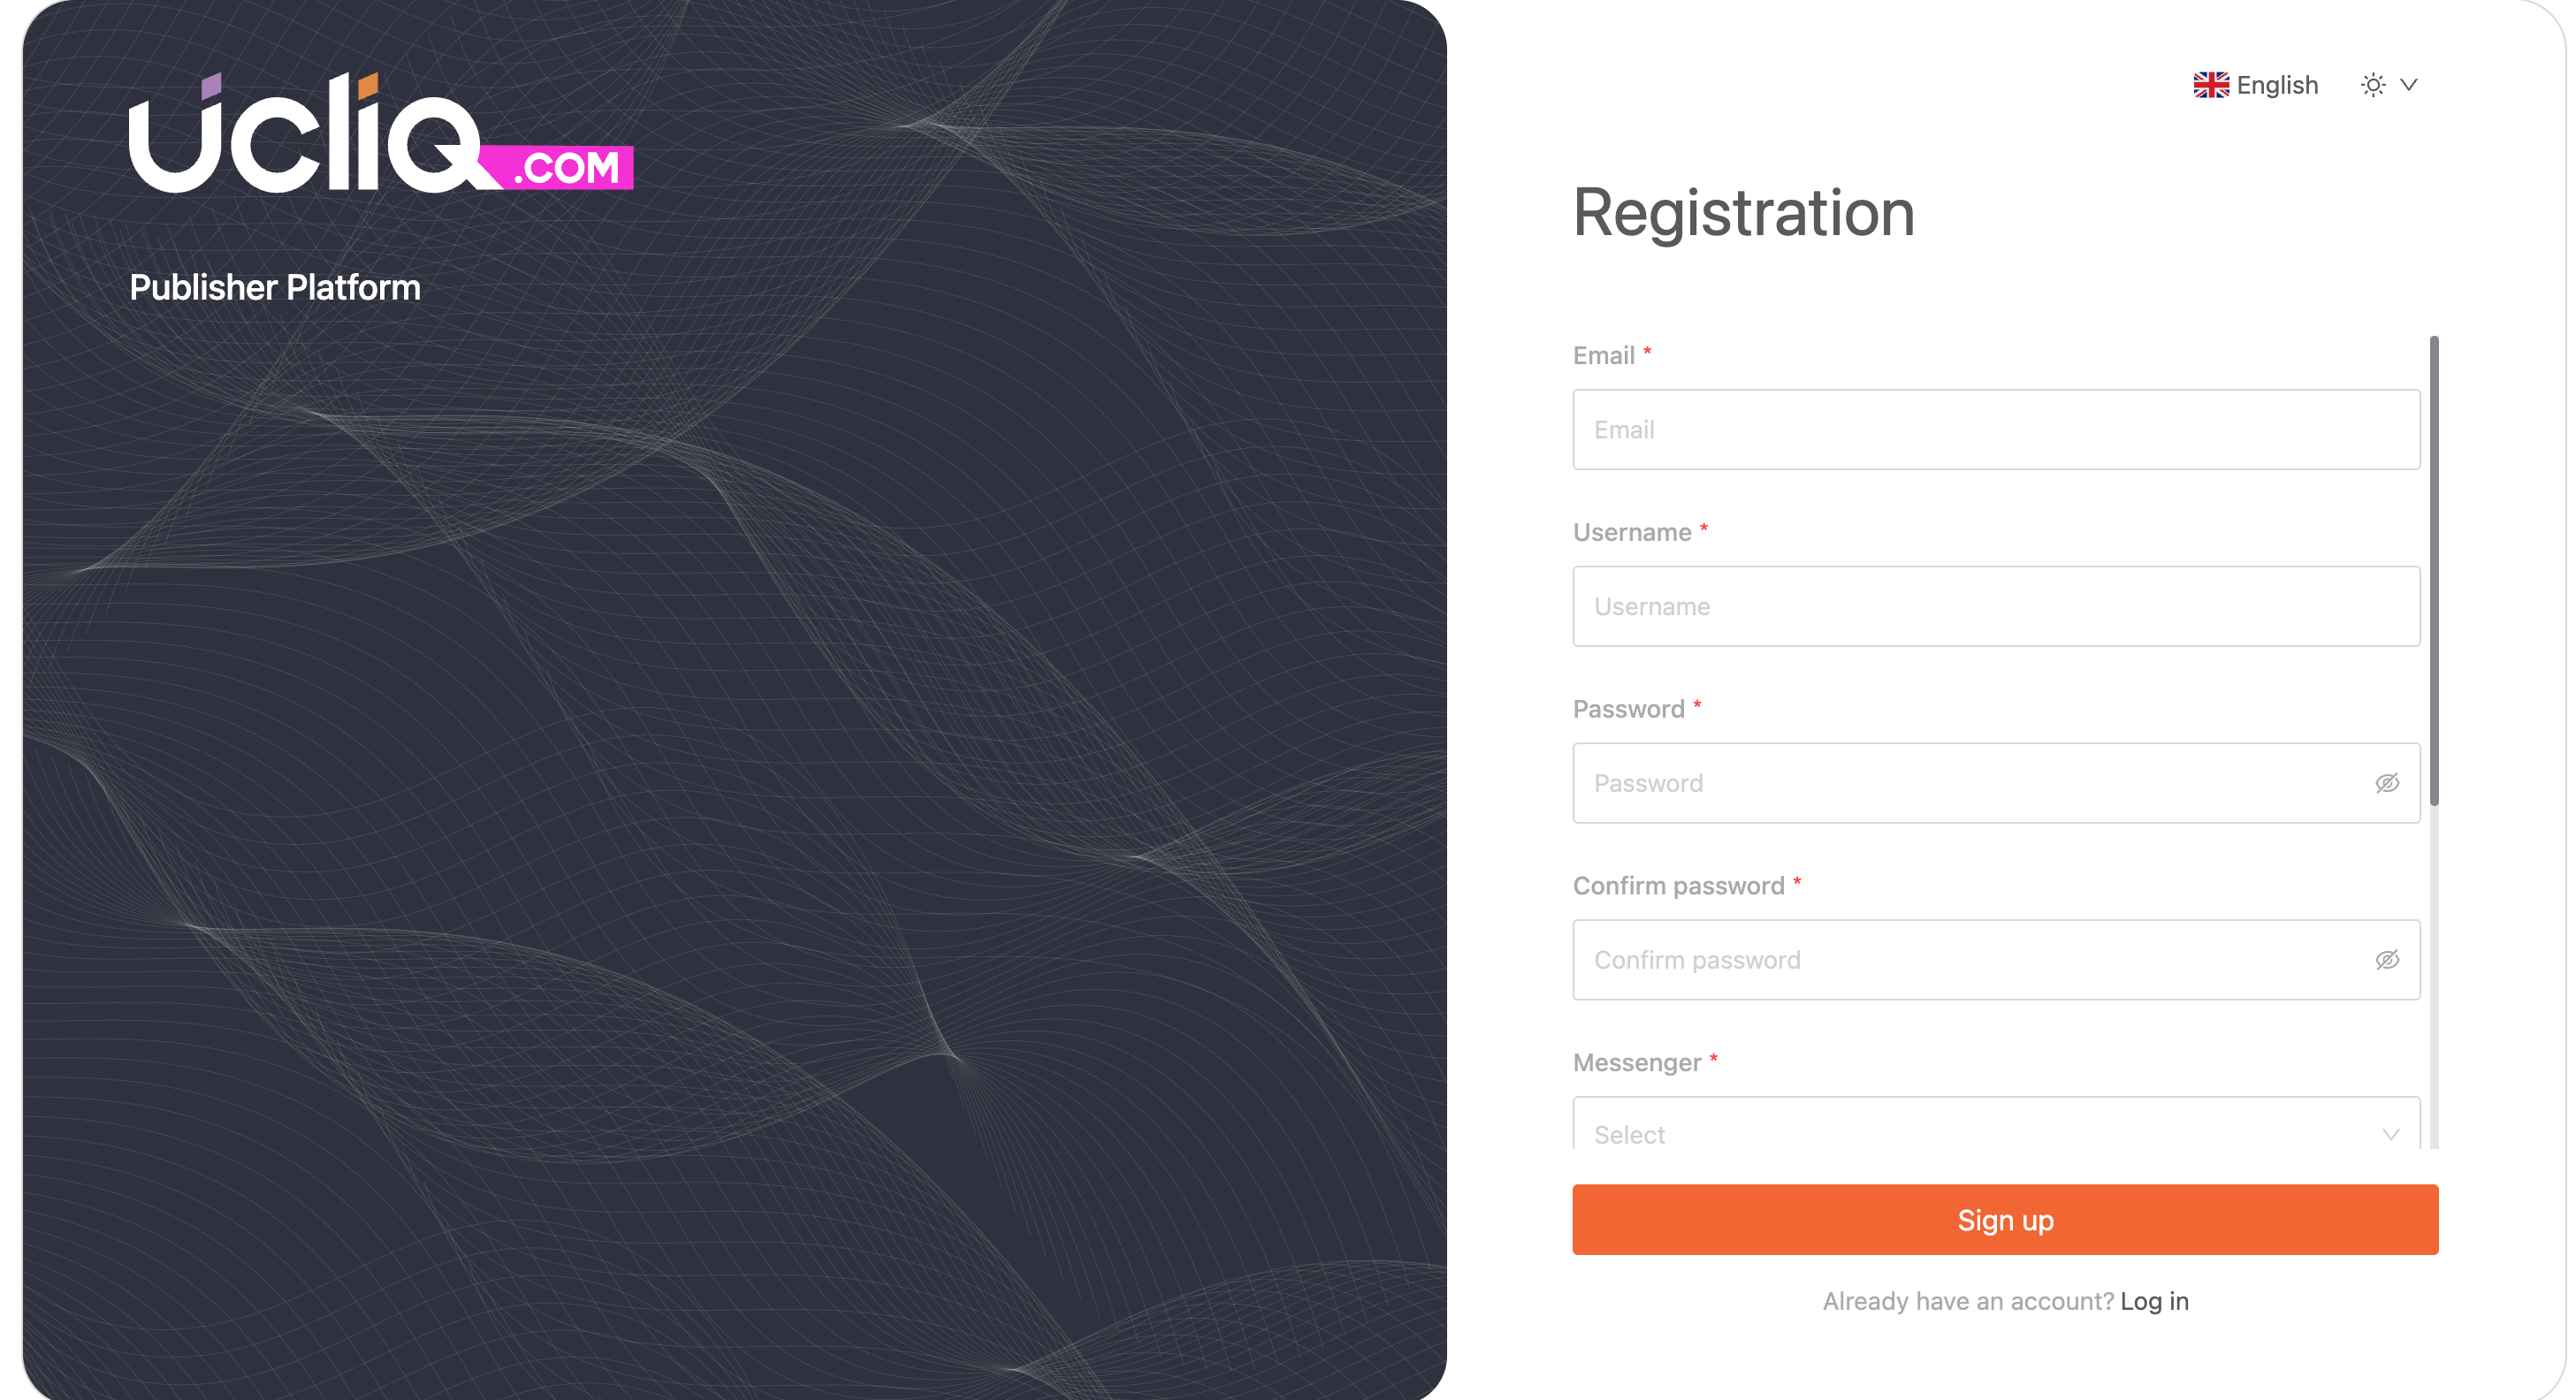
Publisher Registration
Once on the registration page, the publisher will need to complete a registration form. The form includes the following fields:
-
Username: A unique identifier for the publisher (auto-generated during registration).
-
Email Address: A valid email address for communication and account activation.
-
Other Optional Fields: Depending on your setup, you may have custom fields for publishers to fill out during registration. These could be related to traffic types, sources, or any other custom information you require.
After submitting the registration form, the publisher will receive an email with a confirmation link. They must click this link to verify their email address. If the publisher does not confirm their email, they will not be able to access the platform fully.
Manager Review and Approval
Once the publisher confirms their email, the registration will move to the manager for approval. As the platform manager:
-
Go to the Publisher Control Panel in the UCLIQ Manager Portal to review new publisher registrations.
-
You can see the publisher’s information, including the username and email address, and can either approve or reject their registration based on your criteria.
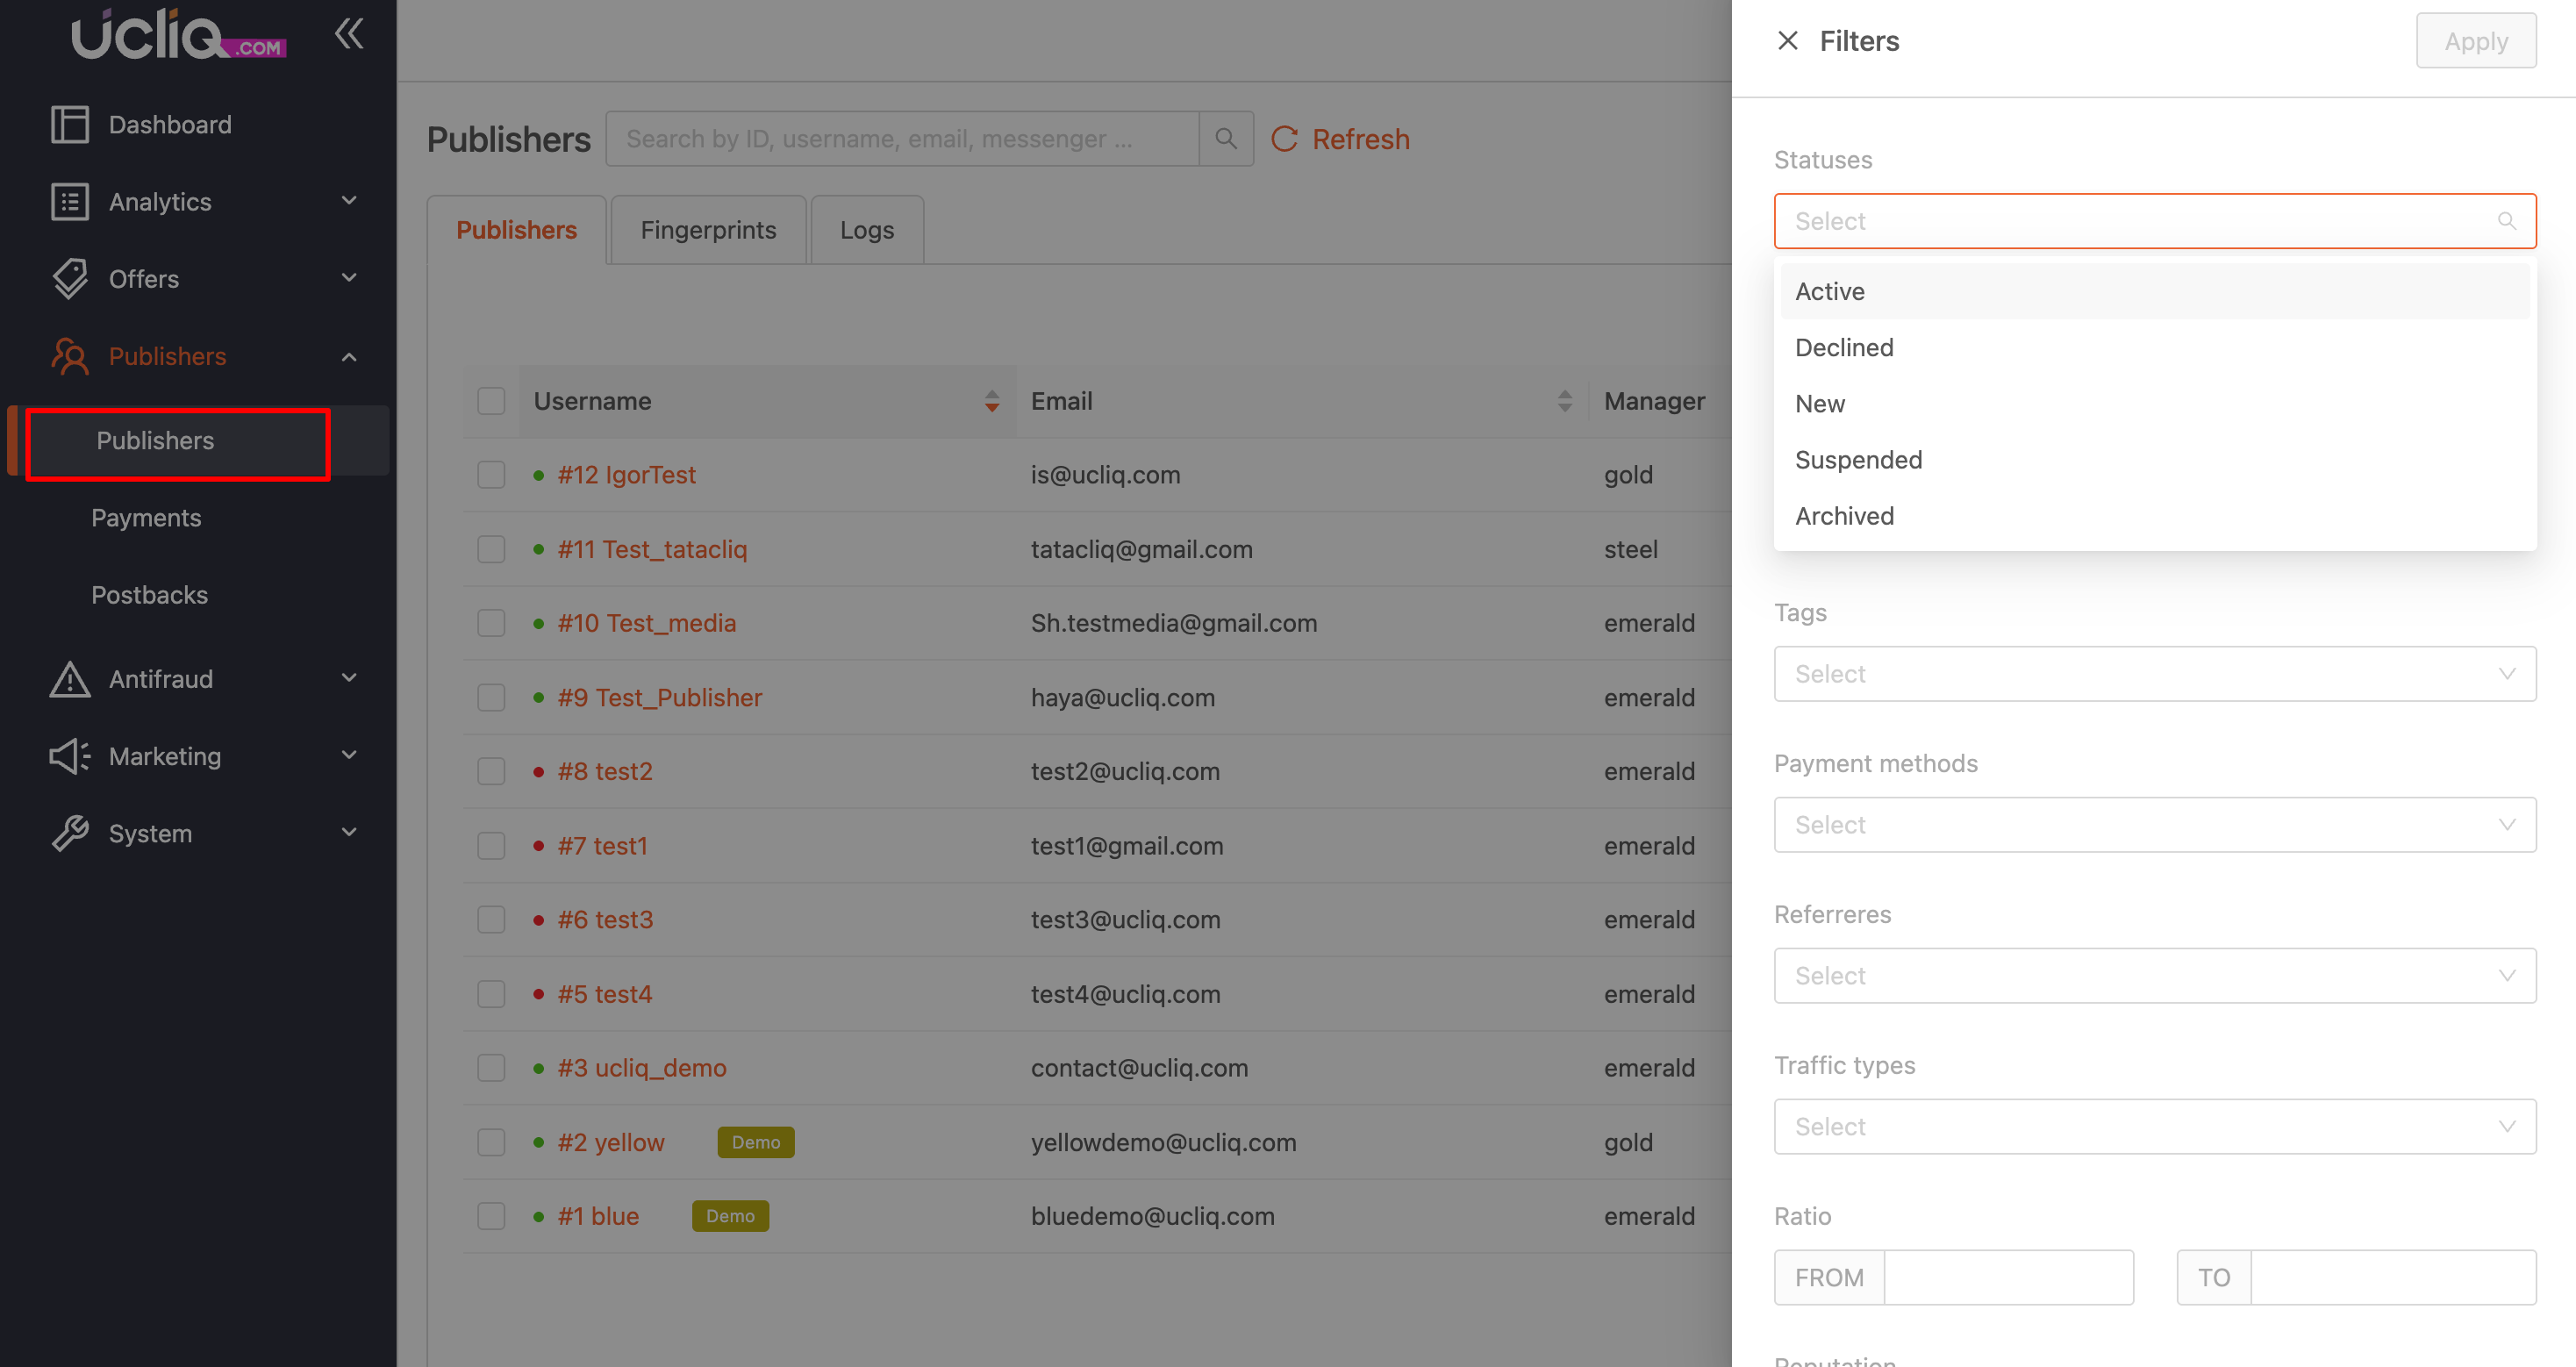
Upon approval, the publisher's status will change from New to Approved, allowing them full access to the Publisher Portal. There are several possible statuses for publishers:
-
New: The publisher has activated their account but not yet been approved by the manager.
-
Approved: The publisher has been reviewed and granted full access to the platform.
-
Pending: Temporarily suspended or under review.
-
Rejected: The publisher has been permanently rejected due to issues such as poor traffic quality or fraudulent activity.
After approval or rejection, the publisher will receive an email notification. The email will contain:
-
Approved Publishers: A link to log into the Publisher Portal.
-
Rejected Publishers: A reason for the rejection.
Once approved, the publisher can log into the Publisher Portal and start creating tracking links, selecting offers, and setting up campaigns. They will now have access to all the necessary tools to manage their affiliate marketing activities.
Demo Access: Even before approval, publishers can use the demo version of the platform to explore its features.
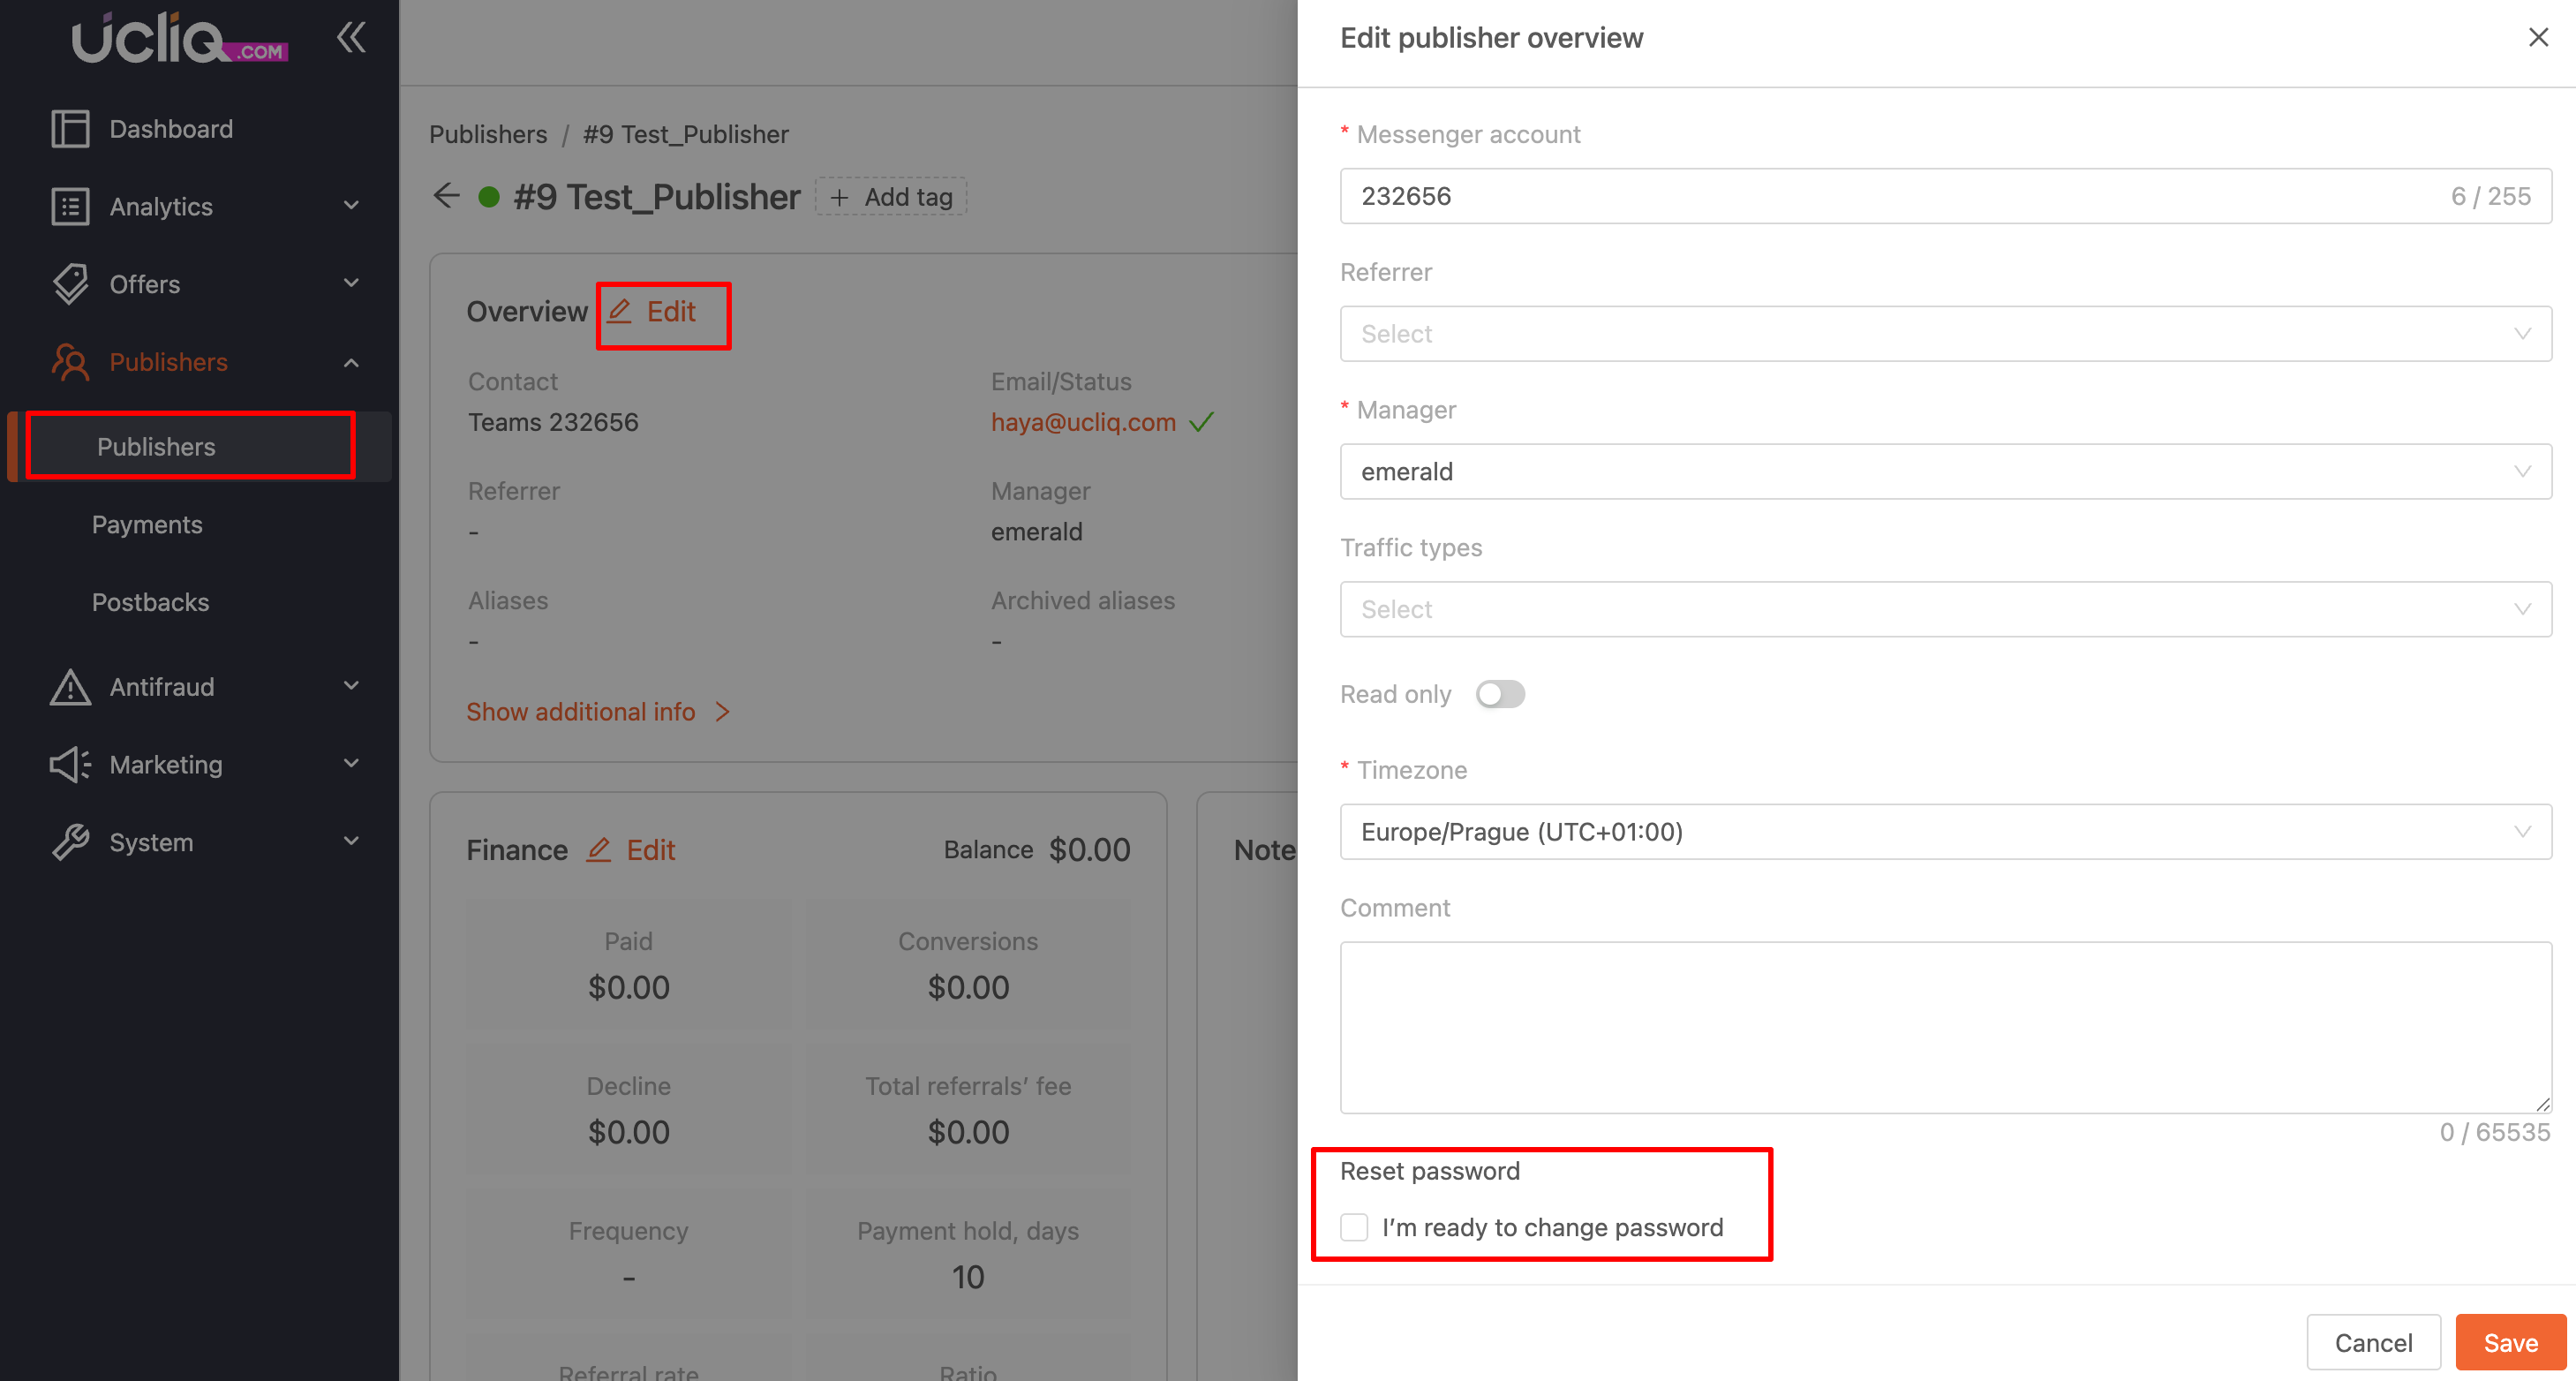
If you need to reset the publisher's password, you can always do it in the publishers account > Edit > Reset Password: